It is easiest to create accessible web pages when you plan to do so from the start. There are some basic steps you can take to help improve the overall accessibility of your digital content.
This page provides information about how to make your digital content more inclusive, including:
- Benefits of accessibility principles
- Identifying content types
- Adding alt text
- Embedding links
- Choosing clear wording and language
- Video captions and transcripts
Please note: the information below is based on using the Drupal CMS. While the same principles apply to all content management systems, the exact steps will differ, depending on the platform being used.
For more information and specifics about editing web pages in Drupal, see our Drupal Training Guide.
Benefits of Accessibility Principles
Accessibility is extremely important on many levels, for many people. The Centers for Disease Control and Prevention (2018) reports that about 1 in 4 adults in the United States have some kind of disability. Many disabilities are not visible, and students are not required to disclose that information.
In fact, according to a report by the National Center for Education Statistics, only about one-third of students with a disability disclosed that fact when they got to college. Faculty or staff members may also have an invisible disability. It is highly likely that there are people on campus who face barriers that others are unaware of such as Fibromyalgia, ADHD, or color blindness.
Why Accessibility Helps Everyone
Many of us will experience some kind of barrier or disability at some point in our lives. Disabilities can be:
- Permanent – such as being blind, having only one arm, or living with ADHD
- Temporary – such as having a broken arm or cataracts
- Situational – such as driving a car, holding a baby, or sharing internet access
Accessibility helps those with disabilities. It also helps everyone who is experiencing less than optimal work or learning conditions.
Accessible teaching practices are a proactive way to help improve the learning experience for all students, regardless of their situation. When you design materials with accessibility in mind, they work better for everyone.
Identifying Content Types
We all browse content using headings, links, lists, etc. Some people use visual cues to guide them through documents. Others use text-based cues that are auditory (such as when listening to a screen reader) or tactile (when using Braille). These types of cues rely on content being properly identified. Simply increasing the font size, changing the color, or making the text visually different does not allow assistive technology to differentiate the text.
To Style a Heading
- From the component editor, select the Paragraph dropdown menu.
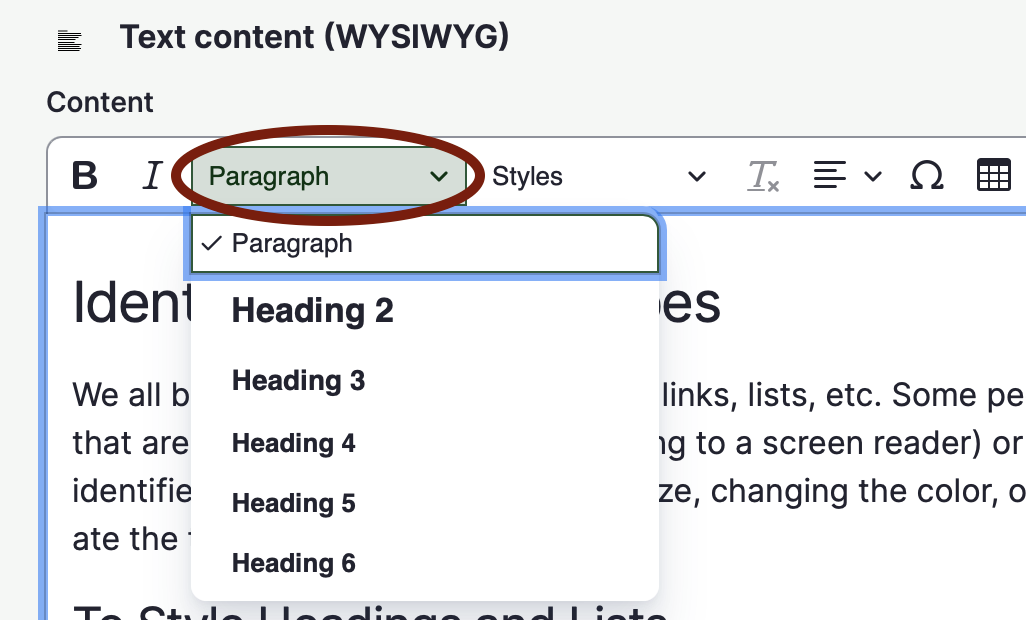
- Select the appropriate heading type. Think of the web page content in an outline format and select a heading appropriate for that format.
To Style a List
- From the component editor, select either the bullets or numbers icon.

- To create sub-lists, use the indent icons, located to the right of the list icons.
- Once you've made the necessary edits and changes, be sure to save the web page!
Adding Alt Text
All images and non-text elements need to have a brief text description, called alternative text (alt text). Non-text elements include photos, charts, graphs, and shapes. Alt text can be added when a new image is uploaded or to an existing image. Once you've made the necessary edits and changes, be sure to save the web page!
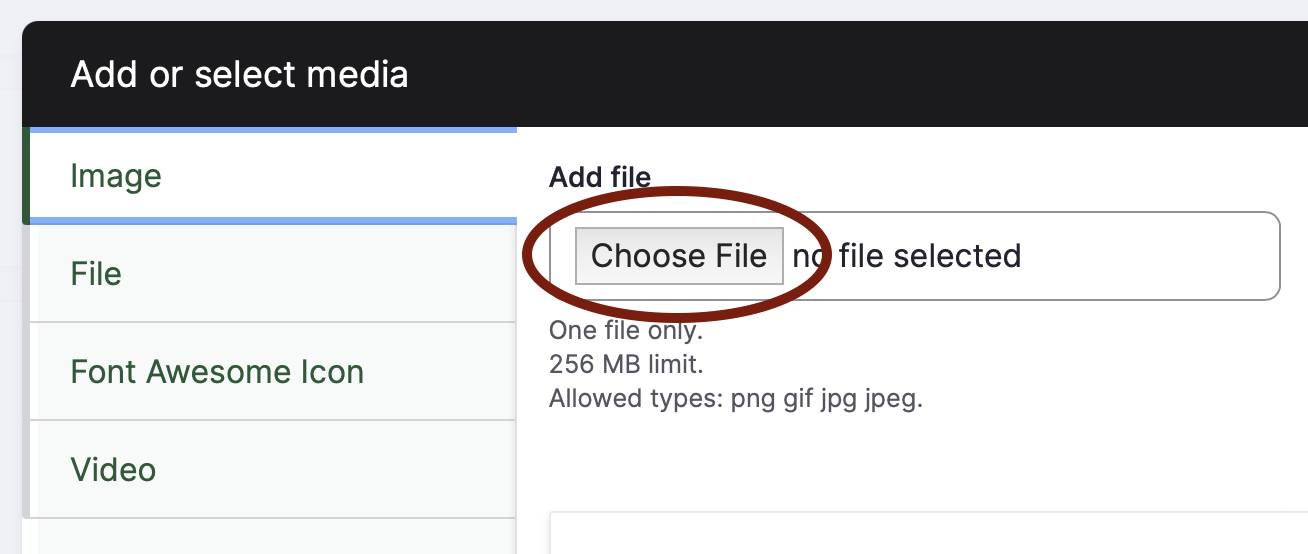
To Add Alt Text to a New Image
- From the component editor, select the Media icon.

- Select the Choose File button.
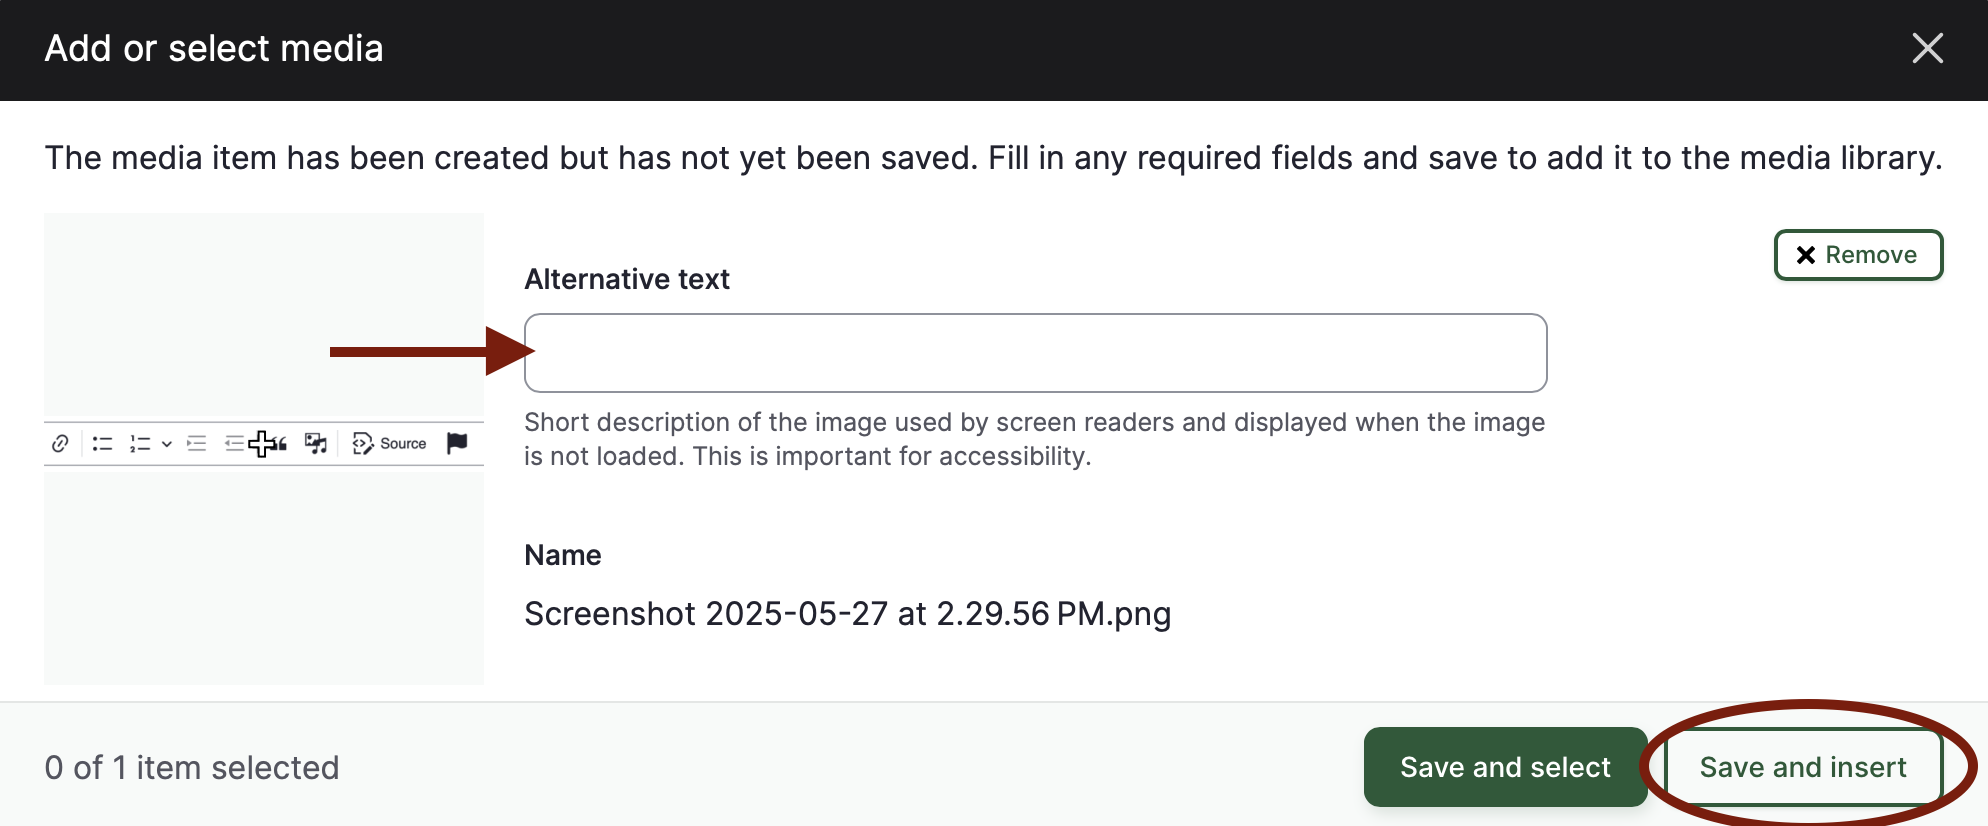
- Locate the image in your local computer, highlight it, then select the Upload button.
- Add a brief description in the alt text box, then select the Save and Insert button.
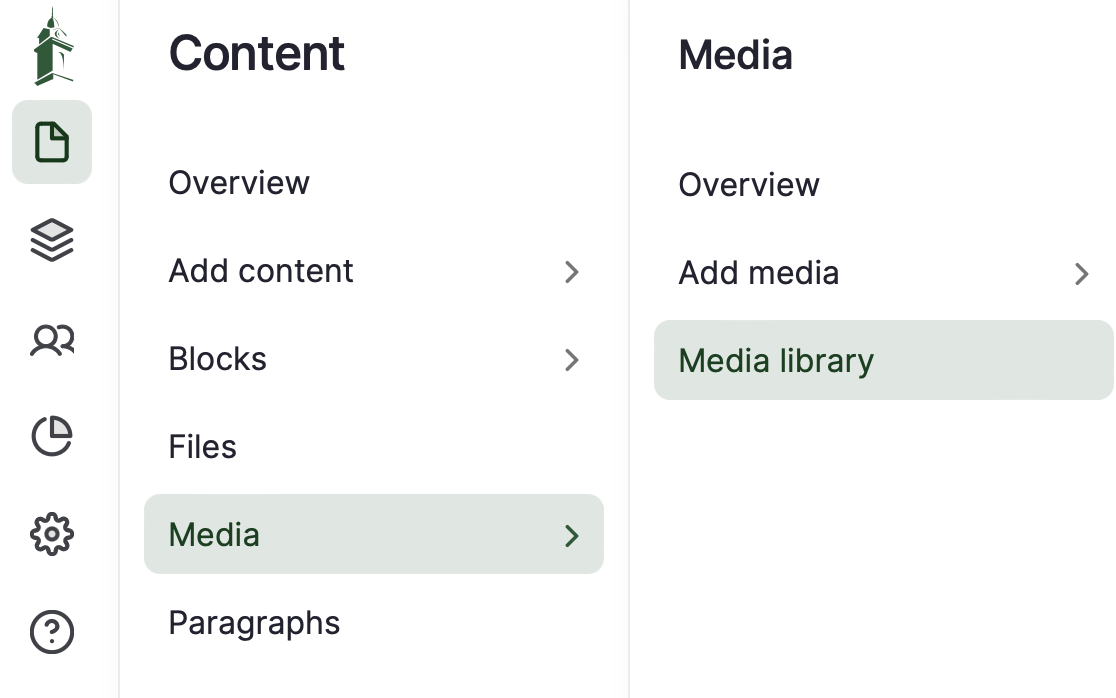
To Add Alt Text to an Existing Image
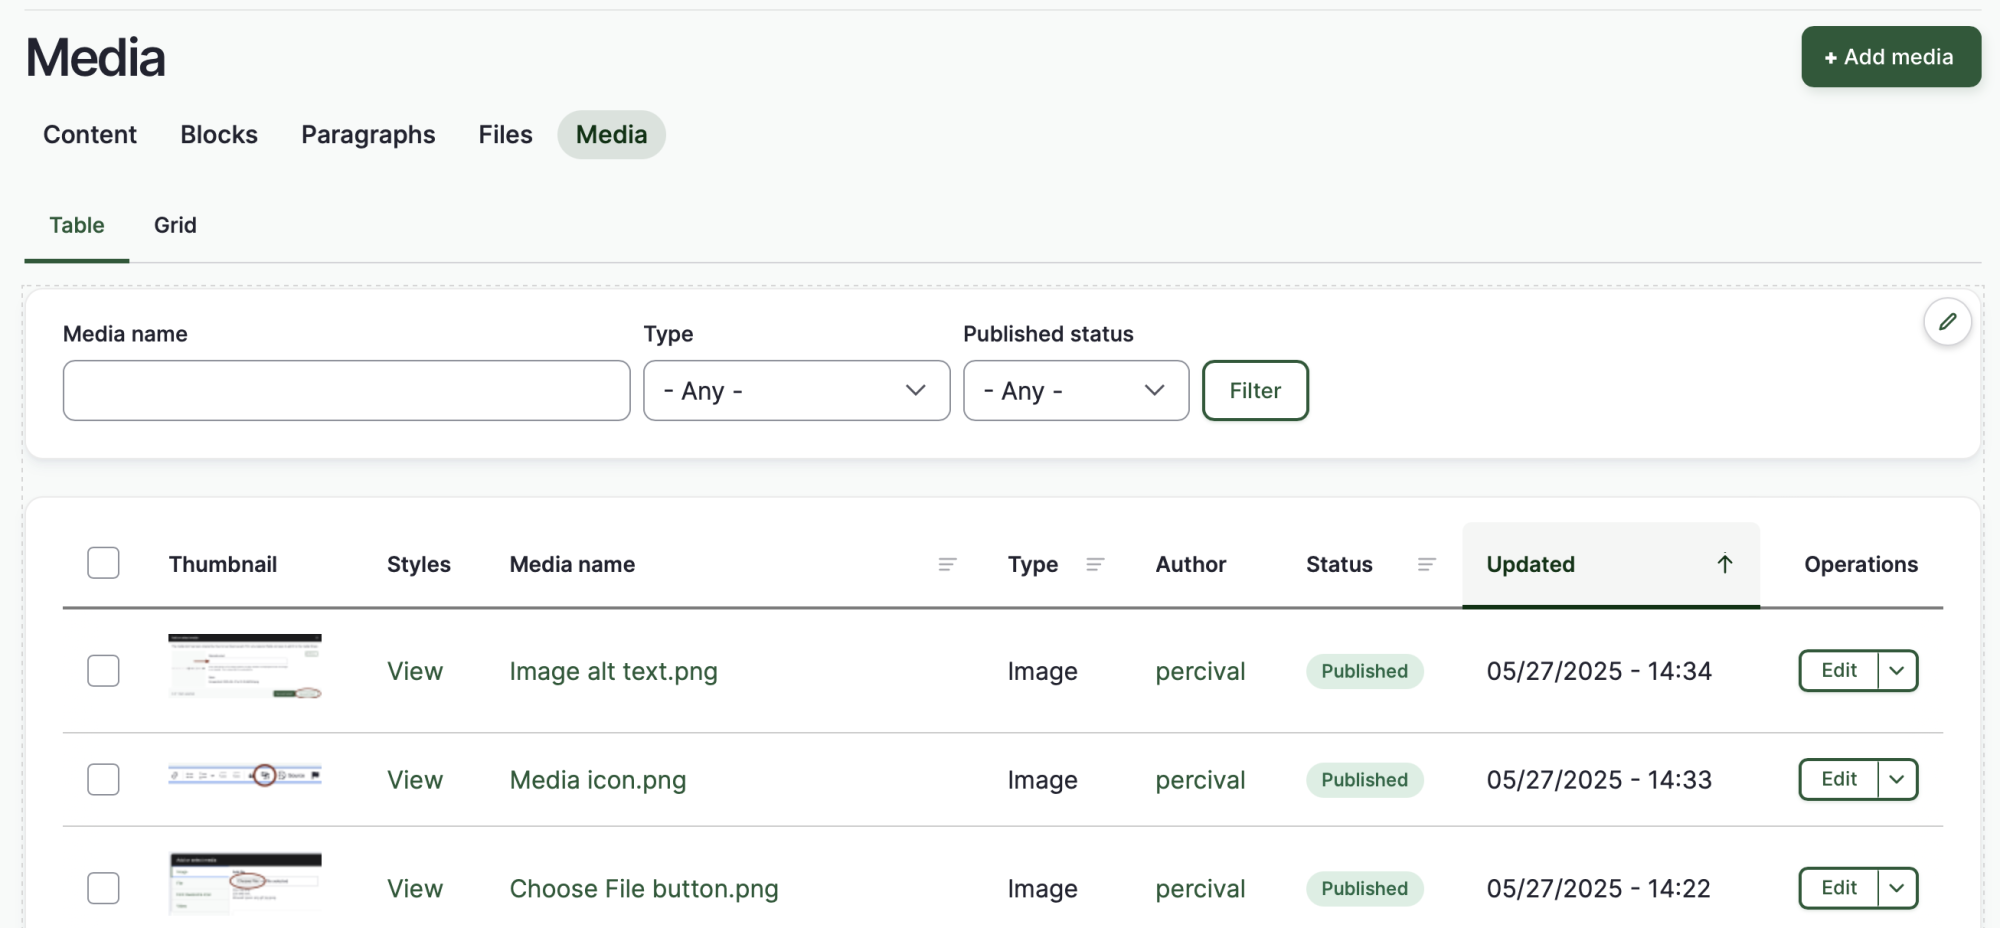
- Locate the Media Library in the left-hand admin panel, under Content (the icon that looks like a piece of paper).
- Once in the Media area, locate the appropriate image from the list. You can filter by file name, type, or status. To filter by name, type a word or two in the Media Name box. When uploading new images, it is recommended to use file names that are logical and searchable.
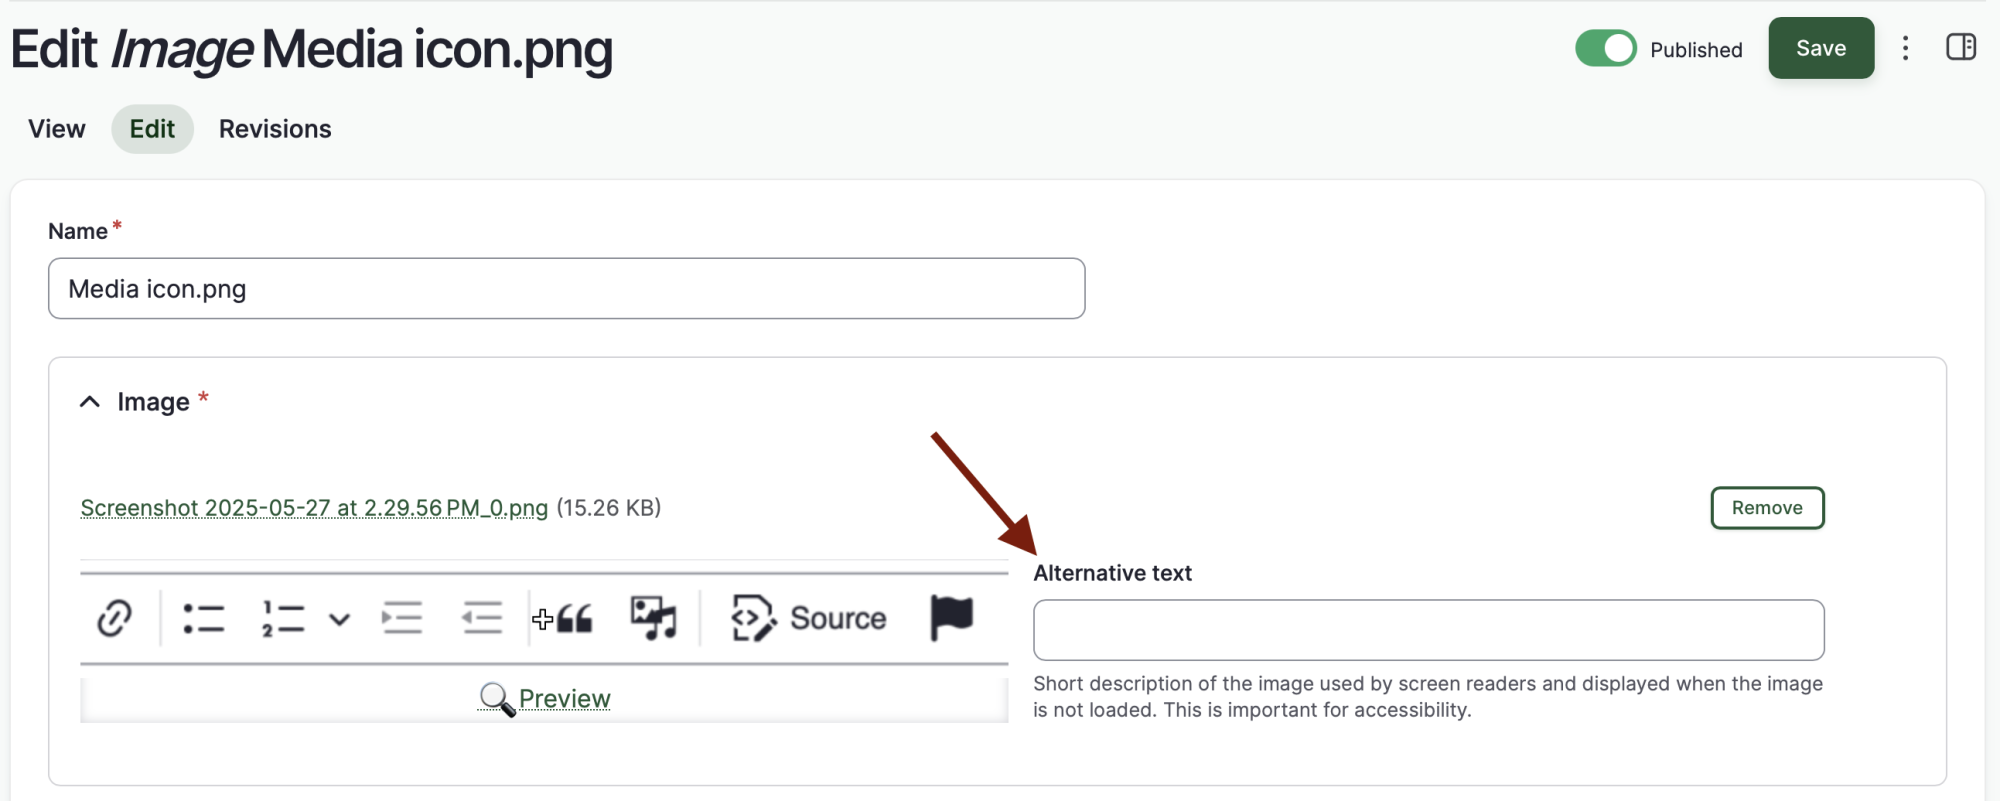
- Open the media file by selecting the Edit button to the right of the appropriate file.
- Add a brief description in the alt text box, then select the Save button in the top right corner.
- Once you've made the necessary edits and changes, be sure to save the web page!
Embedding Links
Like headings, hyperlinks are another key way individuals skim documents looking for relevant sections or content. When a URL is written out, assistive technology will read it in its entirety. Therefore, URLs should be embedded within the text, using clear and concise wording to tell the audience where the hyperlink goes when it is selected.
To Link to an External Website
- Open the destination web page in a new browser tab.
- Copy the full URL.
- In Drupal, open the appropriate page in edit mode.
- Locate the component you wish to edit and select the Edit button on the right side.
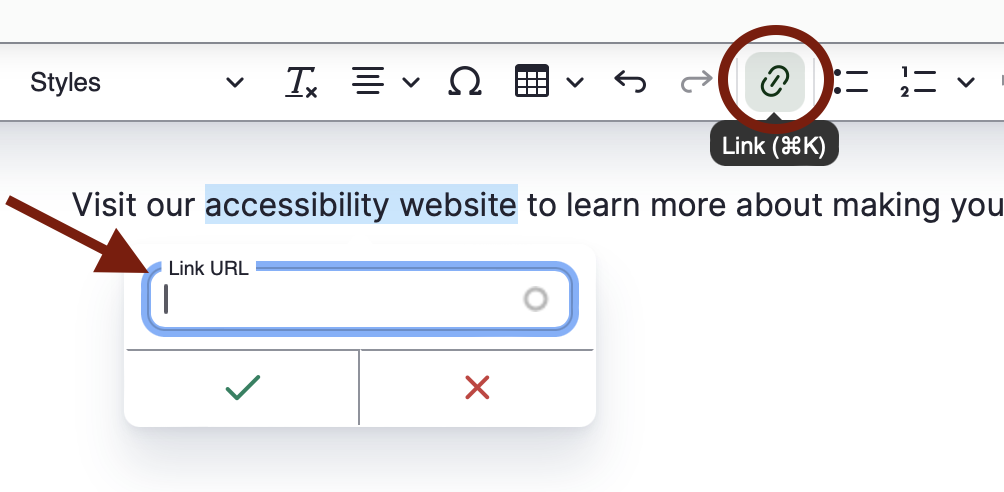
- Highlight the wording that will be the link text. Use specific, concise wording that describes where the hyperlink goes. Avoid using vague phrases or full sentences, as these can create confusion for an assistive technology user.
- From the component editor, select the Link icon.
- Paste the copied URL in the dialog box and select the green checkmark to save.
- Once you've made the necessary edits and changes, be sure to save the web page!
Choosing Clear Wording and Language
Using plain, clear, and concise language means communicating so that your audience will understand information the first time they see or hear it. Plain language helps people with learning or intellectual disabilities, people with a high cognitive load, individuals whose primary language is not English, etc. This does not mean "dumbing down" content. It means presenting information in a clear and well-organized manner.
General communication, including emails, assignment or test instructions, syllabi, and summary content on websites, should be written at the lower secondary (middle school) level. Keeping this type of content clear and concise helps readers save time by making sure they are in the correct place and know what the expectations are.
This is not to suggest that we don’t ask our students to read and analyze complex texts. Content that is disciplinary, such as a course reading, can and should be written at a higher level.
Clear Language Guidelines
- Be straightforward, clear and concise.
- Use conversational wording and simple sentence structures.
- Know your audience and use language they would be comfortable with.
- Organize content in a logical manner. Start with the most important information.
- Use familiar wording to help ensure that everyone gets the same information.
- Limit jargon, specialized terminology, and idioms. Save industry terminology for documents where experts or experts-in-training are the target audience.
More details can be found on the Federal Plain Language Guidelines website.
Video Captions and Transcripts
Any element in your website that is not text-based should have the same content communicated in a text format. While alt text provides a text description for images and graphics, captions and transcripts provide text equivalents for video and audio files. This helps ensure people who can't hear this content still get the same information as those who can.
Captions
Captions provide synchronous text for all auditory content, including sounds that are not words, like laughter and sound effects. Captions help people who are deaf or hard of hearing, non-native English speakers, and people who may be in a noisy environment. Captions are part of the video file and are usually auto-generated by platforms such as YouTube, but should be manually edited for correct wording, spelling, punctuation, and capitalization. If you have a video file with no sound, a note should indicate that “No sound is used in this clip”.
Transcripts
Transcripts should be provided for all audio content. Transcripts are generally documents that are separate from the audio or media file. They provide descriptions for what is said, seen, and heard, including things like laughter, scenery, and music. Transcripts primarily help people who are deaf or hard of hearing but may also be used by screen-reader users or people who just want to skim the content. An additional benefit of transcripts is that they make multimedia content searchable.
For specific information on creating captions and transcripts using YouTube, Panapto, or Zoom, see the Video section of our Tutorials page.