Like any document, it is easiest to make a Microsoft Word document accessible when you plan to do so from the start.
As an alternative to the tutorial below, view the YouTube Microsoft Word Accessibility how-to videos.
Choose a Theme
Use Style Sets
Structuring Content with Font and Paragraph Styles
Outline View
Provide Text Equivalents with Alt Text
Using Columns
Creating Accessible Tables
Provide Descriptive Hyperlinks
Run an Accessibility Check
Converting documents to a newer format
Converting documents to a PDF
Additional Resources
Choose a Theme
Word has built-in themes and layout templates to help make creating documents easier. Use these whenever possible, to help maintain consistency and properly structured content, so screen readers can better navigate the file.
Themes set the overall look of the entire document.
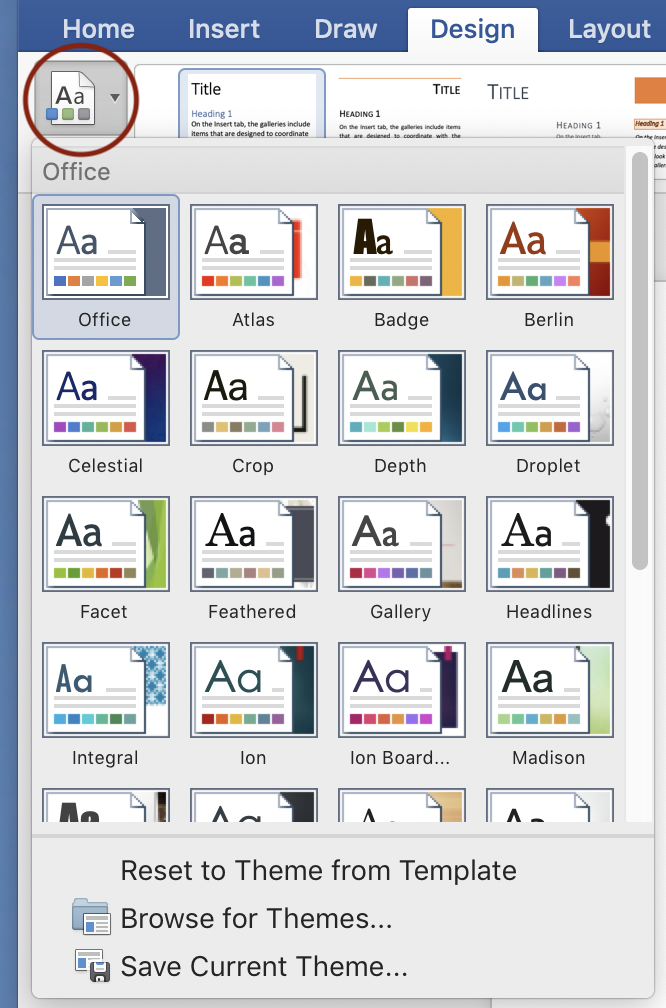
- From the main ribbon, select Design.
- Expand the Themes section by selecting the dropdown arrow.
- Choose a theme. Keep in mind that pre-existing themes are not necessarily accessible. Themes that are clean and simple, with high contrast between text and background are best
.
Attributes such as default font, colors and paragraph spacing can be modified.
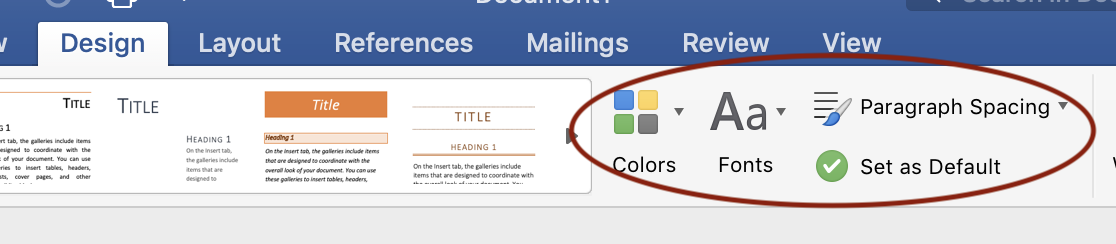
Changes will affect the entire document. Select the Set as Default option to have your current settings applied to all blank documents.
To save your updated theme:
- From the main ribbon, select Design.
- Expand the Themes section by selecting the dropdown arrow.
- Select Save current theme
- Name the theme, and select Save
- The new theme will appear in the Custom section in the Themes drop-down menu
Use Style Sets
Each Theme has a variety of Style Sets. Style Sets determine the visual layout of the document.
- From the main ribbon, select Design.
- Expand the Style Sets section by selecting the dropdown arrow.
- Choose a style set. Keep in mind that pre-existing style sets are not necessarily 100% accessible. Style sets with straight-forward fonts, ample white space, and high contrast between text and background are best.

Attributes that can be modified within the style set include line spacing, default font size, paragraph indentation, bullet/numbering structure, etc. To save a modified style set:
- From the main ribbon, select Design.
- Expand the Style Sets section by selecting the dropdown arrow.
- Select Save as a new style set.
- Name the style set, then select Save.
- The new style set will appear in the Custom section in the Style Set drop-down menu
Structuring Content with Font and Paragraph Styles
Structuring content, by properly labeling things such as headings and lists, helps ensure that assistive technology can better navigate the document.
- In the main menu, select the Home tab.
- All of the pre-set styles are listed in the Styles section
The title and subtitle styles should only be used for a document with a title page. Otherwise, the main heading of the document should be Heading 1. Subheadings under Heading 1 (H1) of the same importance should be Heading 2 (H2). Subheadings under H2 of the same importance should be Heading 3, and so on. No more than 6 levels of headings should be used (H1 - H6).

Outline View
Once a heading structure is created, you can view the document in an outline format.
- From the main menu, select the View tab.
- In the Show section, check the Navigation Pane box.

- On the left-hand side, an outline of the document will open. Note that this is only effective when a heading structure is in place.
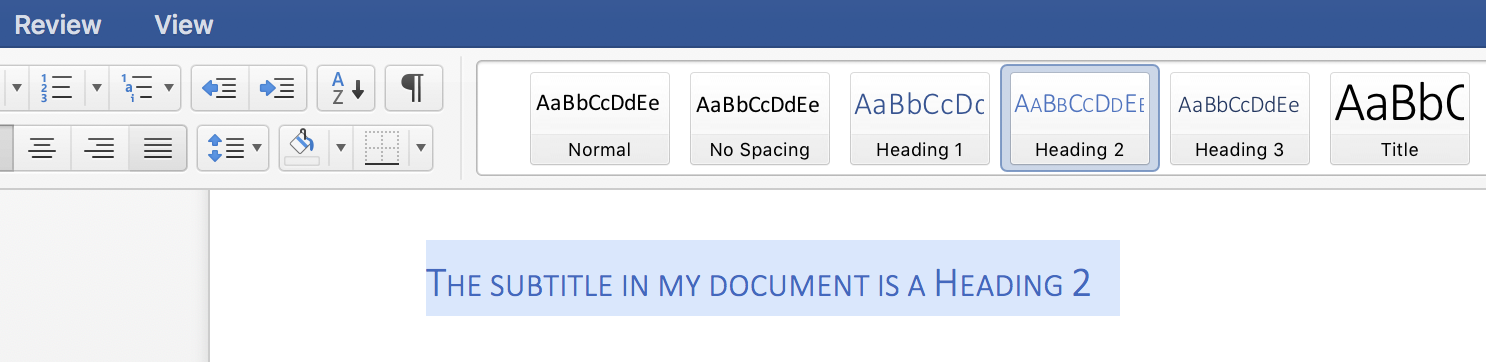
Apply Paragraph Styles Text
These directions assume that no styles have been applied. Do not worry about what the visual style is—you can customize this later (see the Customize Paragraph Styles section below). The default style is “Normal Text.” The normal text style should be used for basic paragraph text.
- Highlight all of the text in the document.
- From the Home tab, choose “Normal” from the Styles menu.
- Highlight the text that serves as the main heading of the document. Choose “Heading 1” from the Styles menu.
- Select a subheading, then choose “Heading 2” from the Styles menu. Repeat this process for all headings in your document.
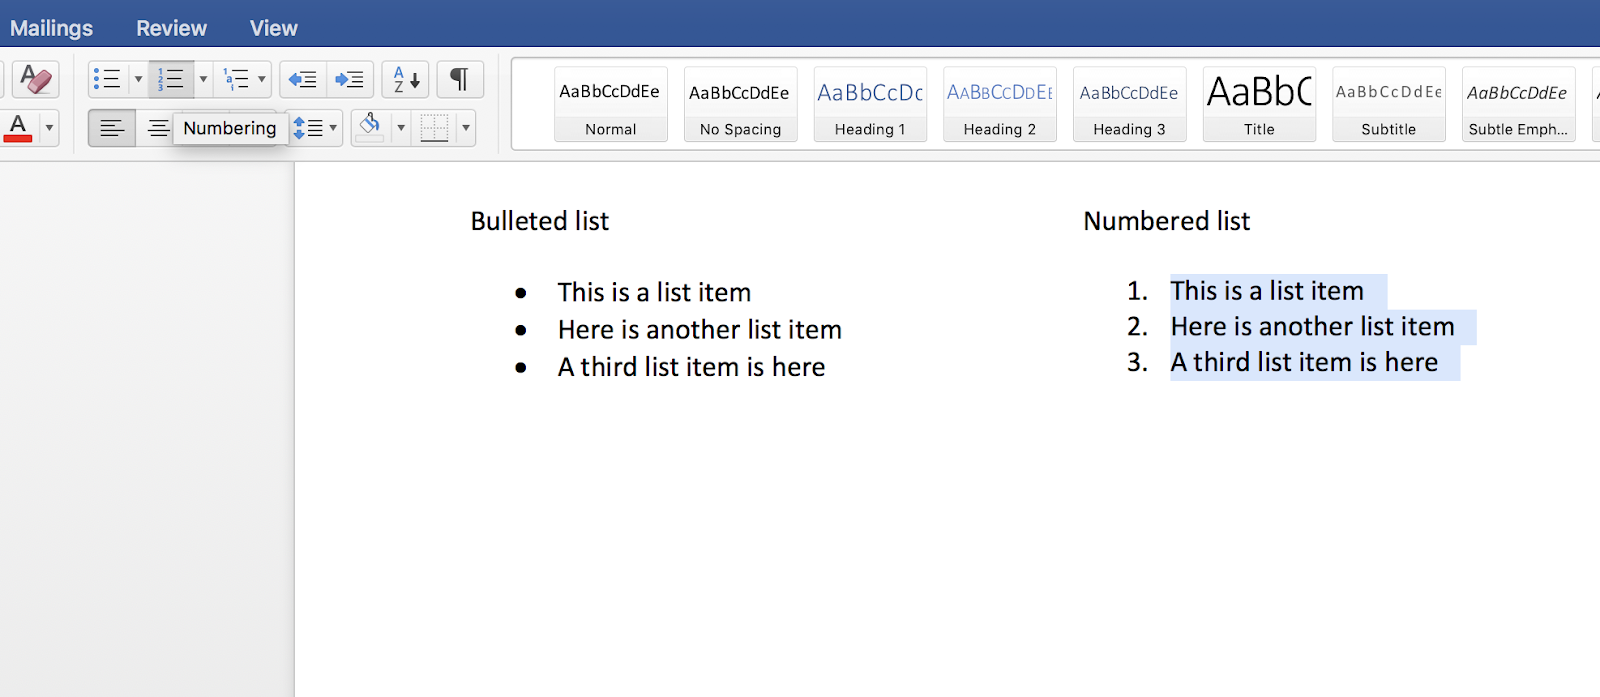
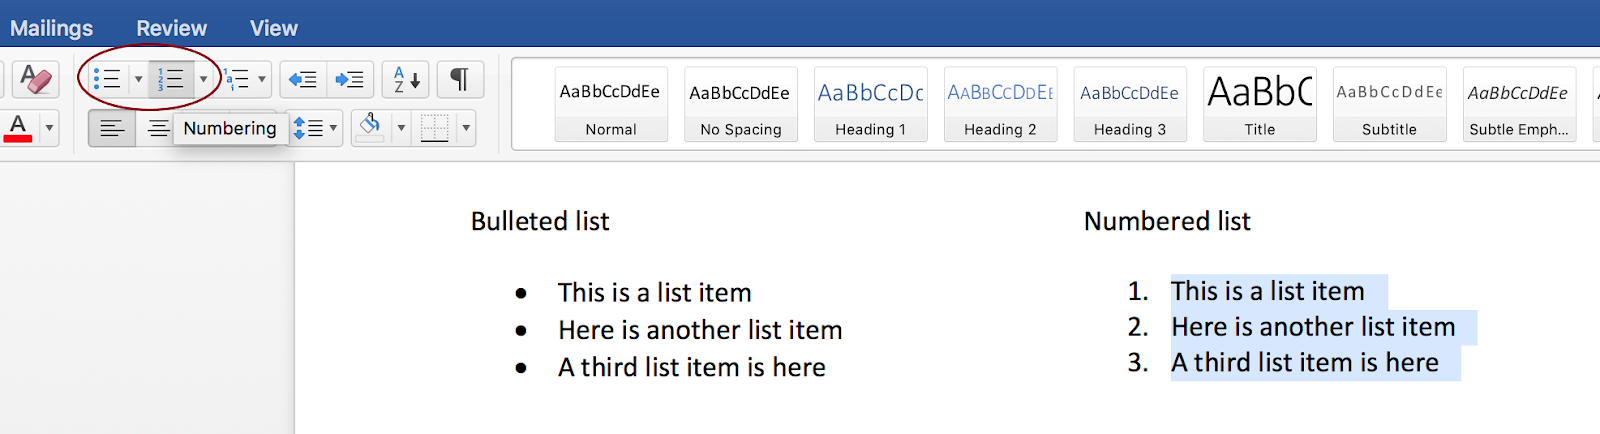
- Highlight any text that is meant to be a list.
- If the list is meant to be sequential choose numbered list from the Paragraph styles section under the Home tab.
- If the list is not sequential choose bulleted list from the Paragraph styles section.
Pro Tip
- Select the style you want to apply before adding new content to save a step. For example, select “Heading 2” from the styles menu before typing in the subheadings.
Customize Paragraph Styles
It is possible to change the default styles associated with Microsoft Word and/or within a specific document. For example, you can change the font, size, and spacing associated with the “Normal” style or any of the headings.
- Highlight text with the style you want to modify applied (i.e. if you want to change the “Normal” style, select paragraph text with that style already applied).
- Modify the size, font, or spacing.
- Right-click on the specific style in the Style menu, and select "Update Normal to Match Selection".
Formatting Tips
- Paragraph text should be 12pts or larger.
- Heading text should be 14pts or larger. Generally, Heading 1 should have the largest font, Heading 2 should have the next largest font, and so on.
- Small print should be 10pts or larger.
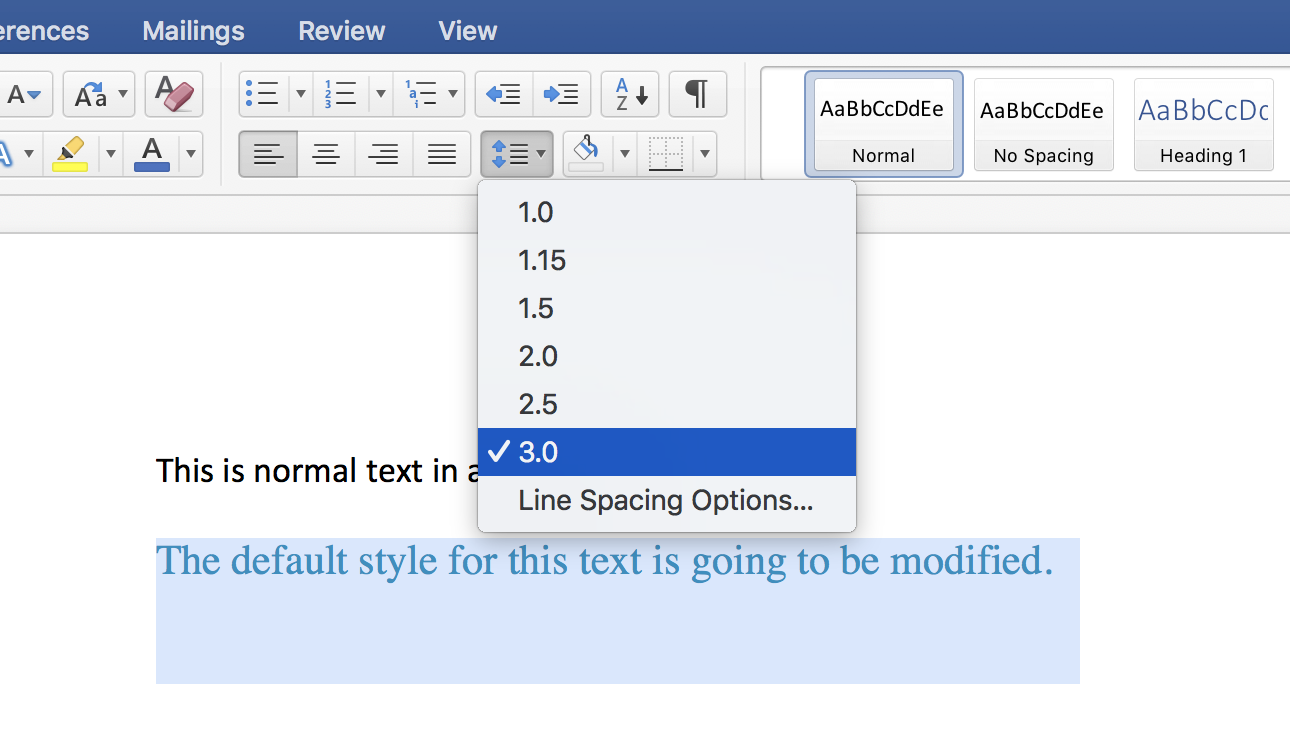
- Line spacing is the amount of space between lines of text in a paragraph. Users with visual impairment or cognitive disabilities have trouble tracking lines of text that are too close together. If lines of text are spaced too far apart, they seem unrelated and can be difficult to read.
- Keep paragraph text lines at a spacing of 1.5.
- The space after a heading should be slightly less than the space above the heading. To change the spacing, select Line and Paragraph Spacing from the Paragraph styles section of the Home tab main menu.
- Don’t use more than one font.
- Use a font designed for the screen like Georgia, Verdana, Droid Sans, Droid Serif, Montserrat, Roboto, or Source Sans.
Pro Tip
- If you like the styles you have set and want to reuse them in each new document you create you can save them as your default styles.
- Right-click on the style you’d like and select modify.
- Be sure “Add to Quick Style list” is checked.
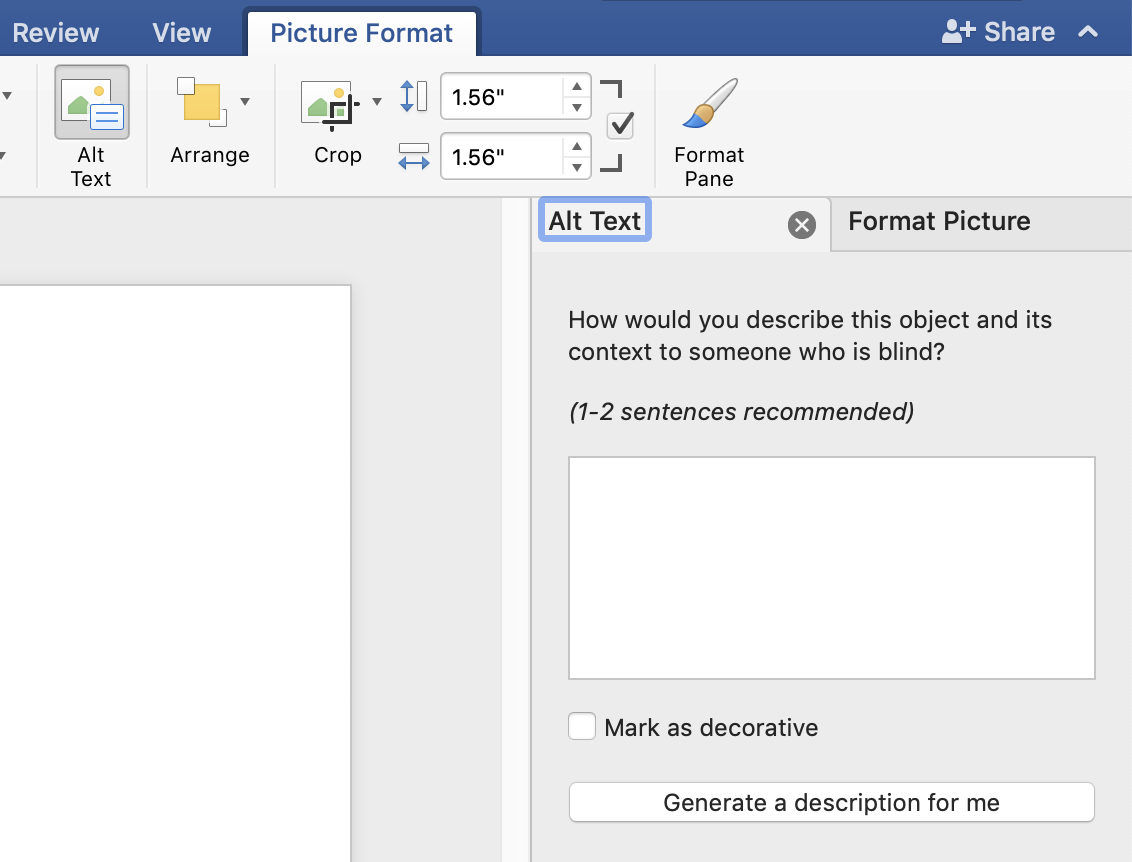
Provide Text Equivalents with Alt Text
All images in a Word document should have alternative text assigned.
- When an image is added, a Picture Format tab appears in the main menu
- From the Picture Format tab, choose Alt Text
- Or right-click on the image and choose Format Picture to open the Format Pane

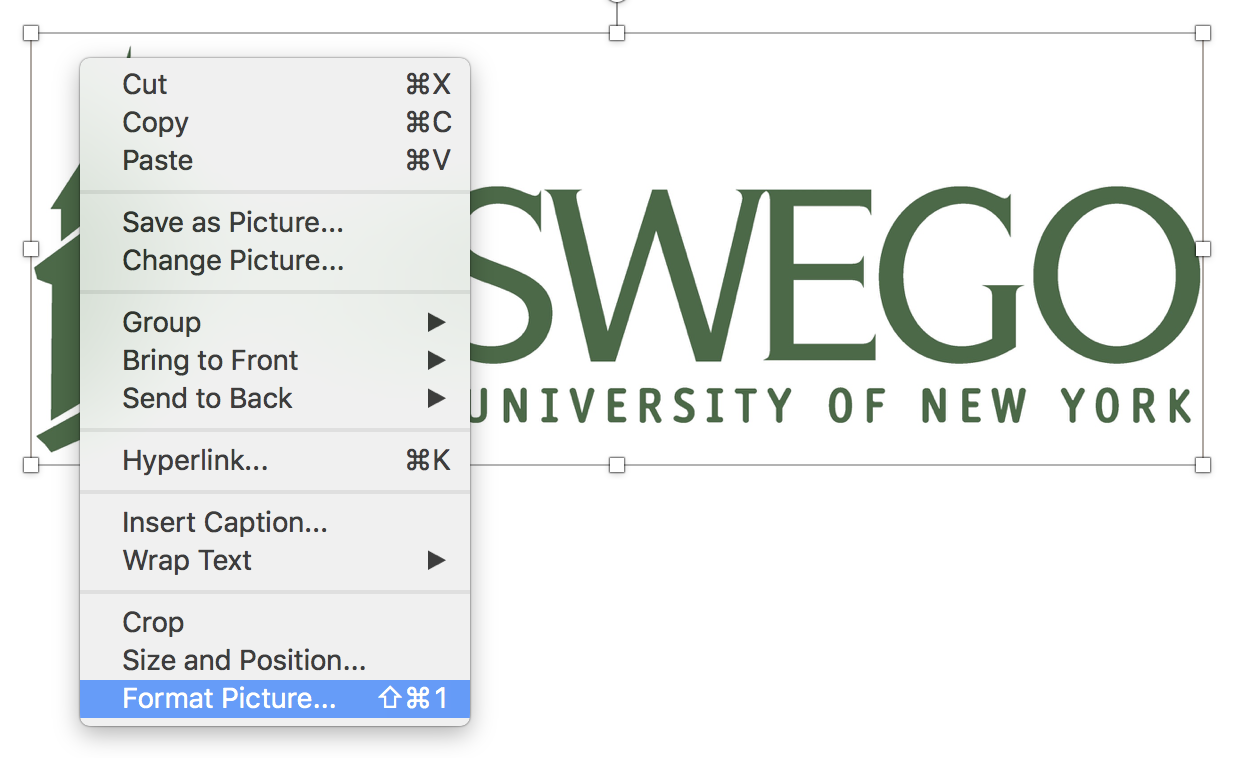
- Provide a full description in the “description” box. In the case of the SUNY Oswego logo, you would write “State University of New York at Oswego.” If the image is more complex, like a chart, provide a title for the chart in the “title” box and a full description of the chart in the “description” box.
- As the designer of the presentation, it is important to know why an image is included, and the alt attribute should be generated based on that reason, or what the image is meant to relay to the audience.
Using Columns
Due to the complexity of accessibility issues, it is not recommended to use tables. Setting up columns is easier and more readily inclusive. Be sure to use the true Columns function in Word rather than making them manually by using tabs or spacing. In the example image below, compare how the table and the columns look.

To create columns:
- Highlight the information you would like placed in columns.
- From the Layout tab, choose Columns.
- Select the number of columns you’d like.
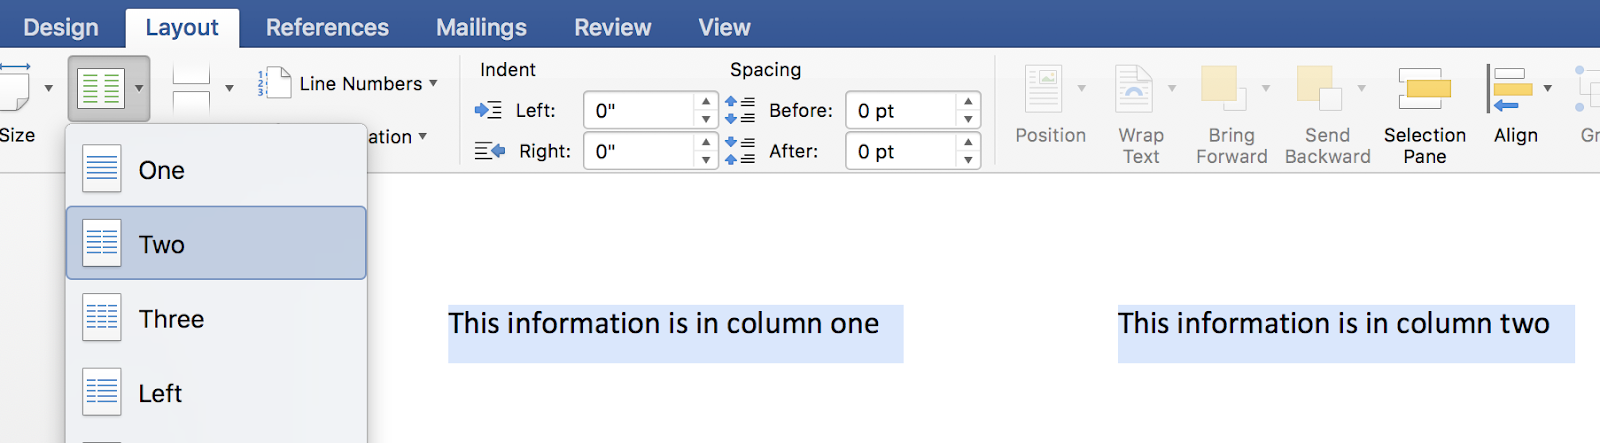
Formatting Tip:
- Styles can be applied to any information in columns, so headings and subheadings can be created.
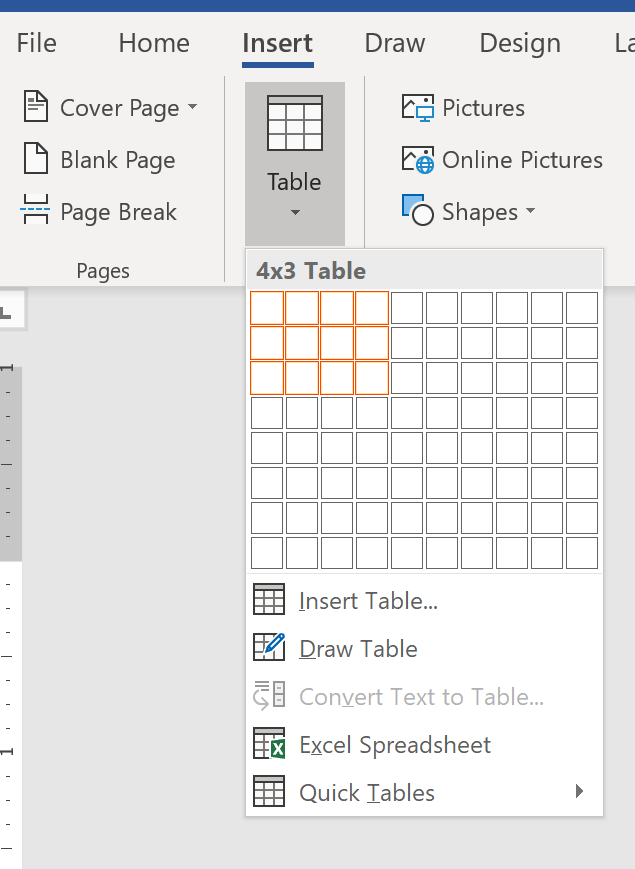
Creating Accessible Tables
Tables should be used for tabular data, not layout purposes. Screen readers identify the number of columns and rows in a data table, read column and row headers, and provide table navigation. Proper markup allows screen readers to navigate through a table one cell at a time.
- From the main menu, select the Insert tab
- Select Table. A drop-down table and menu will appear.
- Highlight the number of rows and columns you’d like in the table
- OR choose Insert Table from the menu below and enter in the appropriate number of rows and columns
Be sure headers are defined:
- Place the cursor inside the table. From the main menu, under the Table Tools section, choose Design.
- The Header Row and First Column boxes should be checked, as appropriate

Alt text should be added for tables. This allows a screen reader user to hear an overview of what the table represents before tabbing through the entire table.
- Place the cursor inside the table
- From the main menu, under the Table Tools section, choose Layout, then choose Properties
- Select the Alt Text tab in the dialog box
- In the description box, enter a short description of the information that is contained in the table
- A title can be added for more complex tables

Styles can be used within tables
- Highlight the cell or row you wish to style
- From the main menu, select the Home tab
- In the Styles section, choose the appropriate style
- Heading styles should be used in a header row

Provide Descriptive Hyperlinks
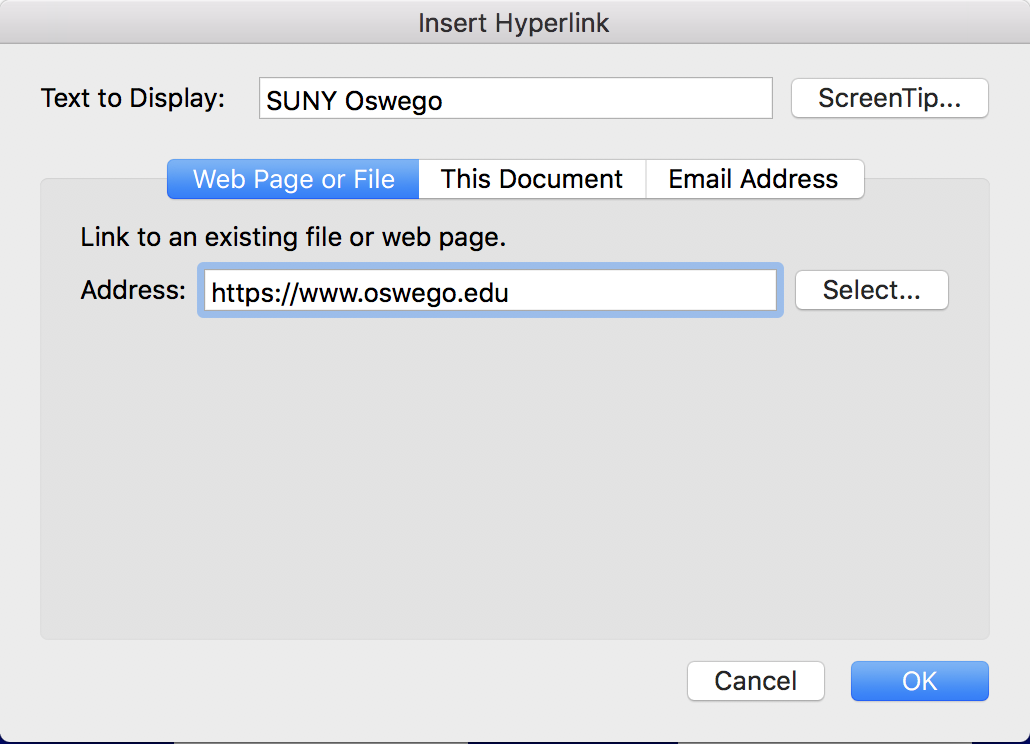
Hyperlinks in an electronic document should be embedded within the text to aid in readability and accessibility. Imagine you have the sentence “I work at SUNY Oswego” in your document and you want the words SUNY Oswego to link directly to the college’s website.
- Highlight the text you would like to convert to a hyperlink (in this example, SUNY Oswego).
- From the Insert tab, choose the Links option from the menu. Or right-click the highlighted text and select Hyperlink.
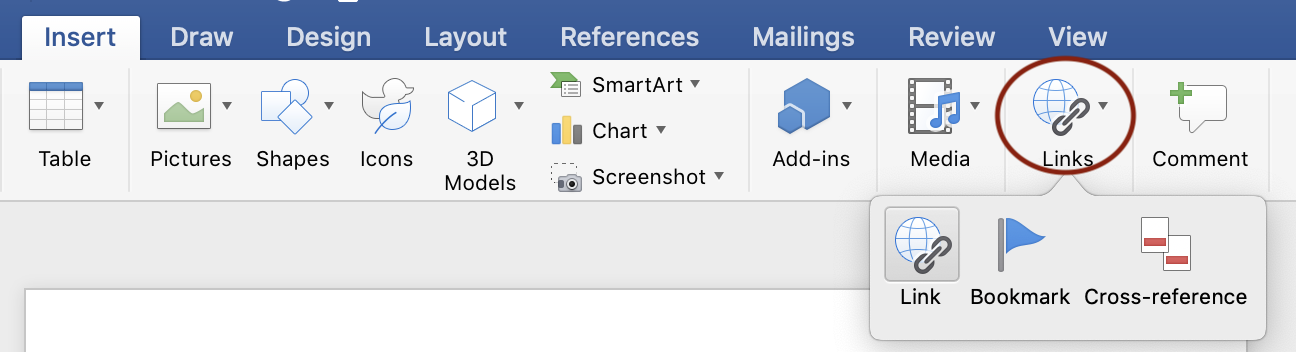
- You can link to external web pages or to a heading within the document.
- To link to an external page, choose Web Page or File, and include the full URL in the Address field (in this case, http://oswego.edu).
- To link to a heading within the document, first, make sure the text you want to link to is a Heading (see Structuring Content with Paragraph Styles). Highlight the appropriate text and open the Hyperlink option. Choose This Document, and select the Heading you want to link to.
- In the example below, the word “resume” would link to the "My Resume" heading.
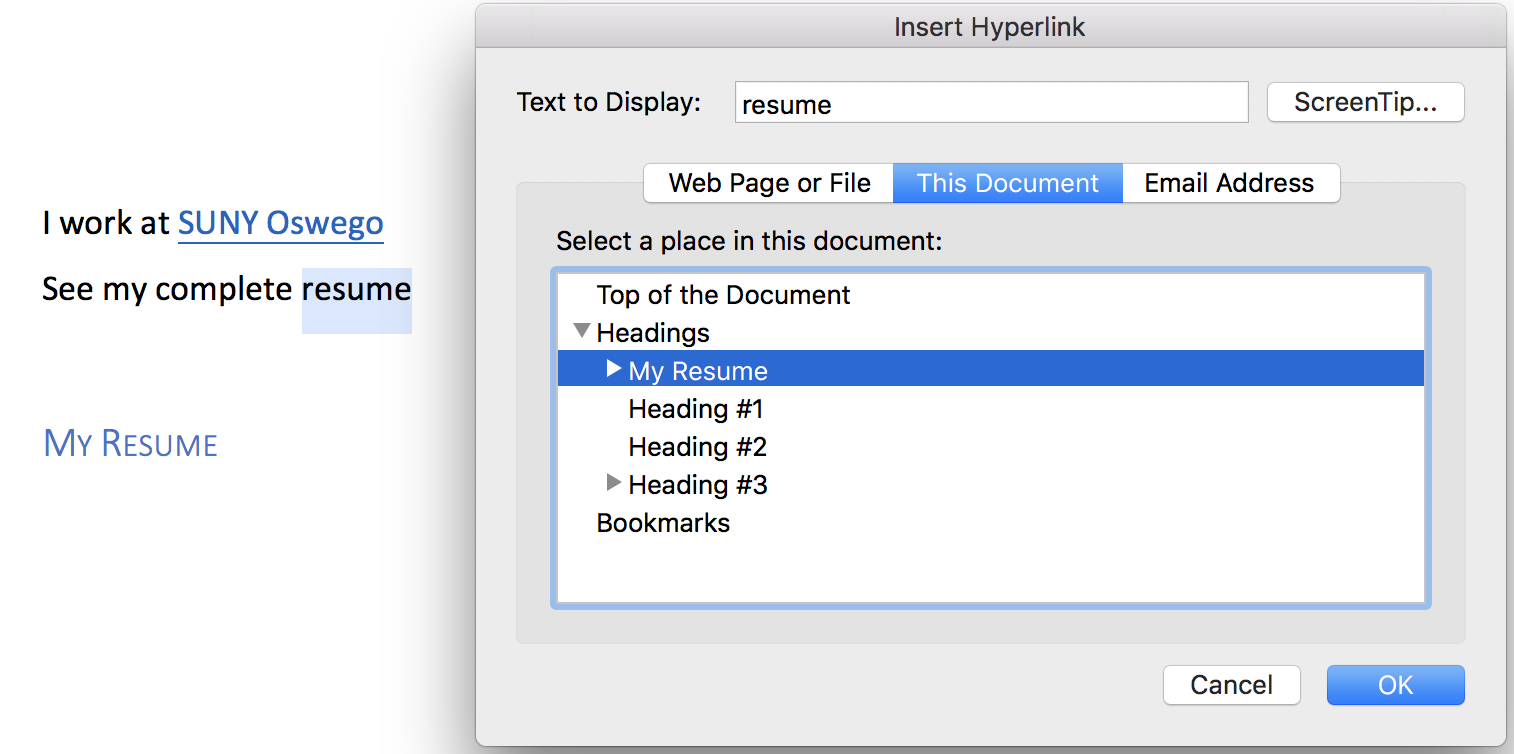
- Select “OK.”
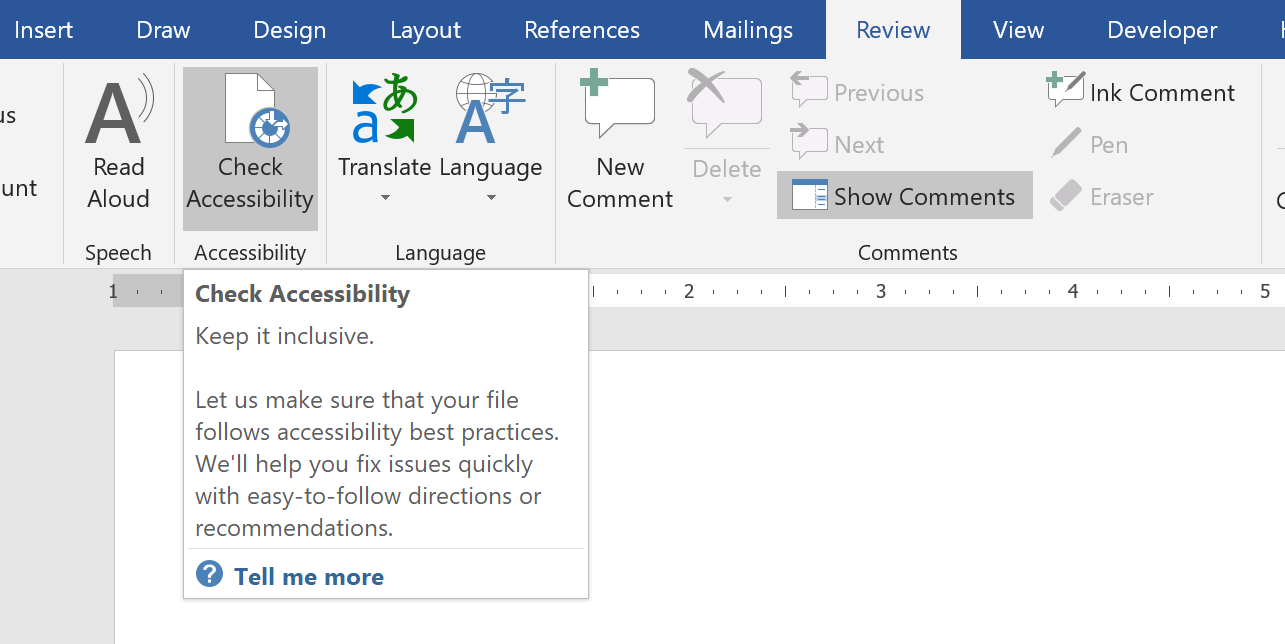
Run an accessibility check
Microsoft Word has a built-in accessibility checker.
- From the main ribbon, select the Review tab.
- Choose Check Accessibility. This will show you errors, warnings, and tips to follow.
- Address each issue one at a time throughout the document.
- Select the Check Accessibility button from the Review tab again when you have completed each task to receive an updated report.
- Continue to revise until all checks have passed.
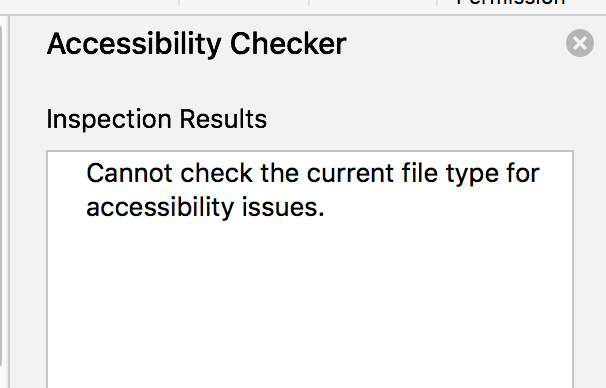
Converting documents to a newer format
When the document was created with a version of Word that is older than the version you are currently using, you may receive an error message that the Accessibility Checker can’t be run.
To convert the document to a newer version:
- From the File menu, click Convert Document
- A dialog box will open, click OK

- Save the new version of the document.
- Run the Accessibility Checker.
Converting documents to a PDF
When you export a Word document to another format, like a PDF, it is important to note that your document may not be fully accessible in the new format (even if the original document is). If you convert your document to a PDF, be sure to review and revise that document in Acrobat Pro with its built-in accessibility checker (See Adobe Acrobat PDF tutorial).
- From the main ribbon, select the Acrobat tab
- Select Create PDF

- Name the document and determine where to save it
- Select the Options button. Another dialog box will open.
- Be sure the “Enable Accessibility” box is checked
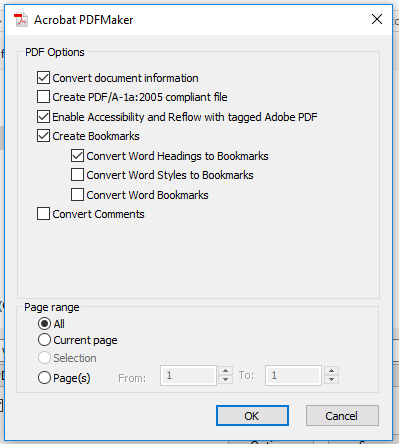
- Select Ok
- Select Save
Additional Resources
- Article, “Make your Word documents accessible” from Microsoft Office Support
- Article, “Creating Accessible Documents” from WebAIM
- Article, “Creating Accessible Word 2013 Documents” from The National Center on Disability and Access to Education