Like any document, it is easiest to make a Google Doc accessible for digital distribution when you plan to do so from the start.
As an alternative to the tutorial below, view the YouTube Google Docs Accessibility how-to videos.
Structuring Content with Paragraph Styles
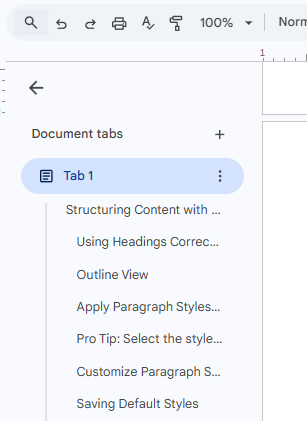
Outline View
Provide Text Equivalents with Alt Text
Using Columns
Creating Accessible Tables
Provide Descriptive Hyperlinks
Run an Accessibility Check
Exporting and Downloading Google Doc
Additional Resources
Structuring Content with Paragraph Styles
Google Docs includes Paragraph Styles, which allow you to properly structure your document for readability, navigation, and accessibility.
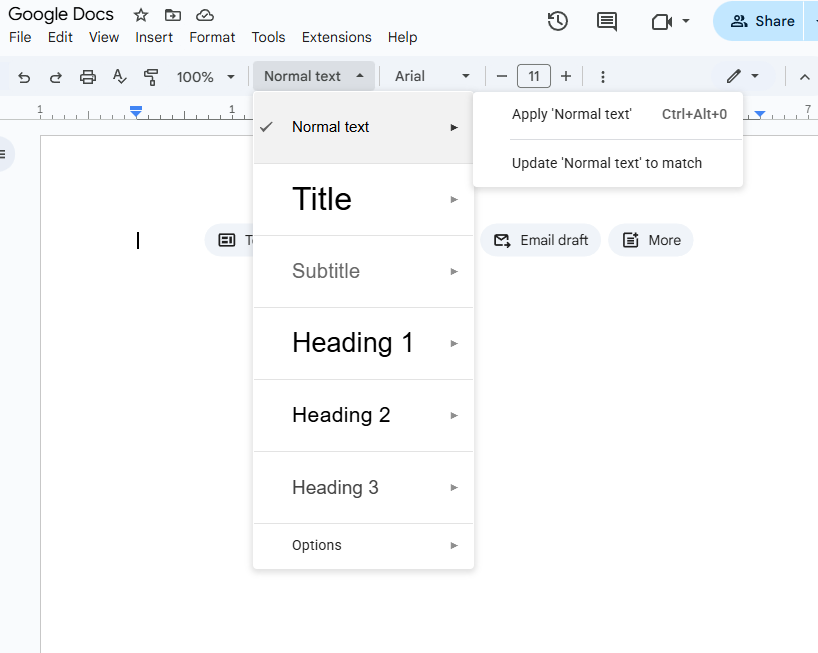
You can access paragraph styles from:
- The Styles dropdown menu in the formatting toolbar (it usually displays “Normal text”)
or
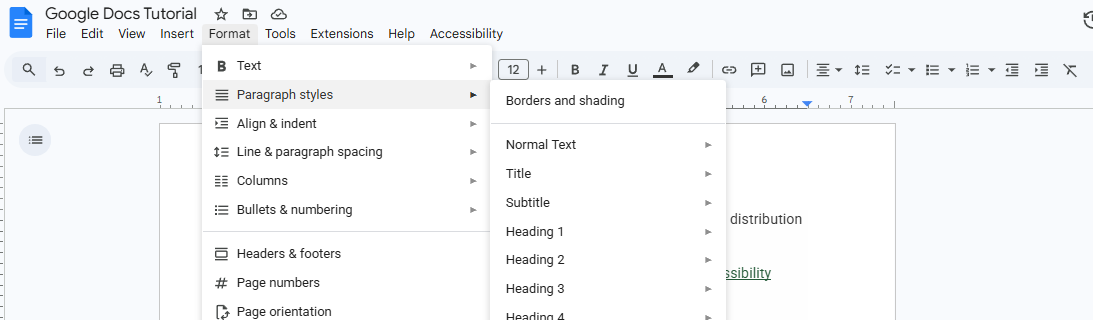
- Format → Paragraph styles
The default style is Normal text, which should be used for standard paragraph content.
Using Headings Correctly
Headings create structure in your document. This structure improves readability and enables navigation features.
- Title and Subtitle should only be used if your document includes a title page.
- The main heading of your document should be Heading 1 .
- Subsections under Heading 1 should use Heading 2 (H2) .
- Subsections under Heading 2 should use Heading 3 (H3).
- Continue in order as needed, up to Heading 6 (H6).
- Do not skip heading levels (for example, do not jump from Heading 1 directly to Heading 3)
Avoid manually formatting text (bolding, enlarging font size) to create headings. Always apply the appropriate heading style so your document remains structured and accessible.
Apply Paragraph Styles Text
These directions assume no styles have been applied yet. Do not worry about visual formatting, you can customize styles later.
- Select all text in the document and choose Normal text from the styles menu.
- Select the main heading of the document and choose Heading 1.
- Select each subheading and apply the appropriate heading level (Heading 2, Heading 3, etc.).
- Highlight text that should be formatted as a list:
- Choose a numbered list if the order matters.
- Choose a bulleted list if the order does not matter.
Pro Tip: Select the style you want before typing new content. For example, choose “Heading 2” before typing a subheading to save time.
Customize Paragraph Styles
You can modify styles within a specific document or set default styles for all future documents. To modify a style:
- Highlight text that already has the style applied (for example, text formatted as Normal text).
- Adjust font type, size, spacing, or other formatting using the toolbar.
- Go to Format → Paragraph styles → [Style name] → Update “[Style name]” to match.
Saving Default Styles
If you want to reuse your customized styles in future documents:
- Go to Format → Paragraph styles → Options
- Select Save as my default styles
Your preferred formatting will now apply automatically in new Google Docs.
Formatting Tips
- Paragraph text should be 12 pt or larger.
- Headings should be 14 pt or larger.
- Heading 1 should be the largest.
- Heading 2 should be slightly smaller.
- Continue decreasing in size by level. Heading 6 should be the smallest.
- Small print should be 10 pt or larger.
- The space after a heading should be slightly less than the space before it.
- Adjust spacing using Format → Line & paragraph spacing → Add/Remove space before or after paragraph.
- Use only one font family throughout the document.
- Choose screen-friendly fonts such as:
- Georgia
- Verdana
- Montserrat
- Roboto
- Source Sans
- Choose screen-friendly fonts such as:
Outline View
Once you apply heading styles, Google Docs automatically creates a Document Outline.
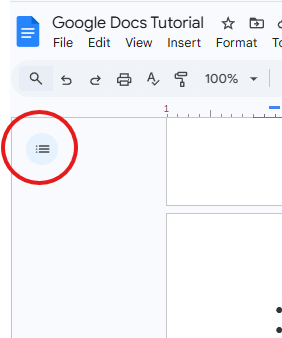
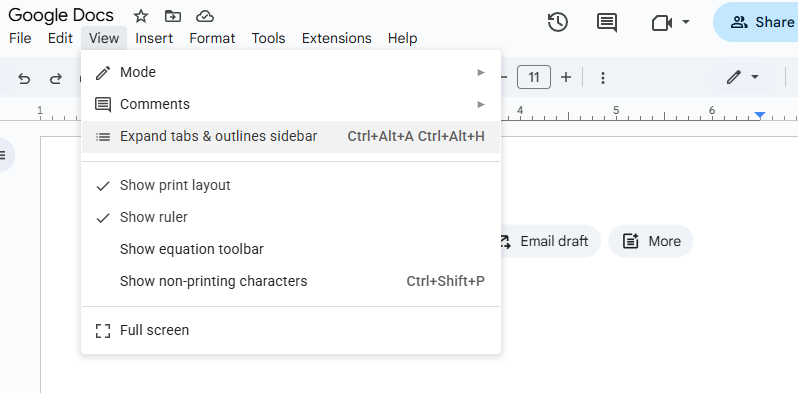
To open the outline:
- Select the outline icon in the left-hand margin,
- or
- Go to View → Expand tabs & outlines sidebar
- On the left-hand side, an outline of the document will open. Note that this is only effective when a heading structure is in place.
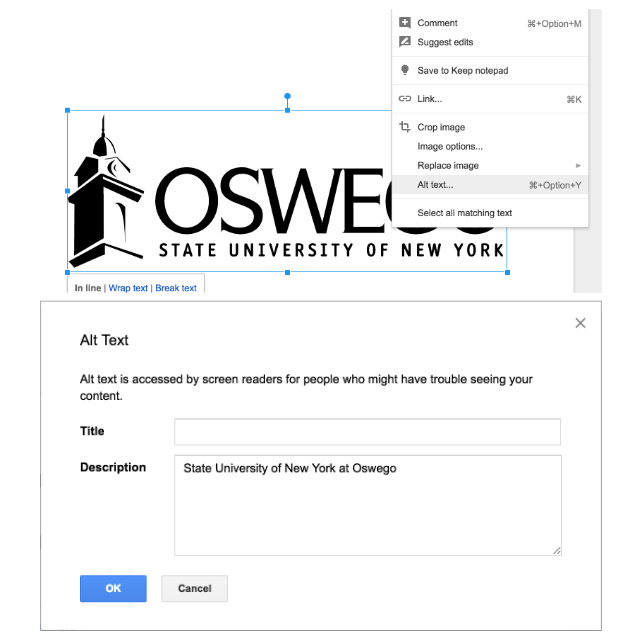
Provide Text Equivalents with Alt Text
All images in a Google Doc must include alternative text (alt text) so screen reader users can understand the content and purpose of the image.
To add alt text:
- Select the image in your document.
- Right-click the image and choose Alt text.
- Enter a description in the Description field.
Writing Effective Alt Text
- Describe the meaning or purpose of the image, not just what it looks like.
- Be concise but complete.
- Avoid starting with “Image of…” or “Picture of…” (screen readers already announce it as an image).
Example:
For the SUNY Oswego logo, write:
"State University of New York at Oswego."
Example (complex image like a chart):
- Provide a short label in the Title field (e.g., “Fall Enrollment by Year”).
- Provide a full explanation in the Description field summarizing key trends and data points.
If an image is purely decorative and does not convey meaningful information, it should not be included. If it must remain, briefly indicate that it is decorative in the description field.
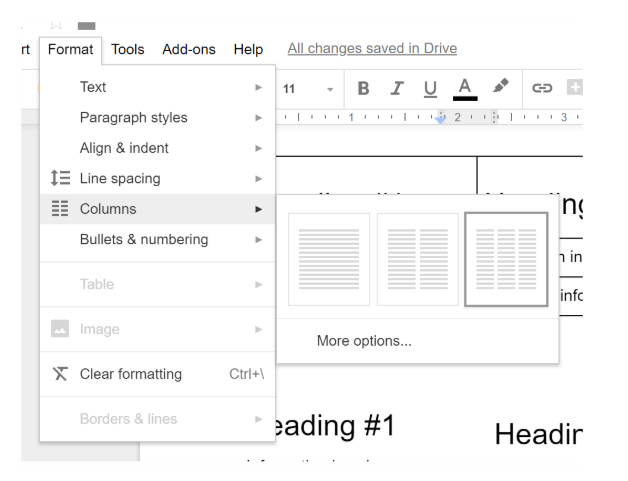
Using Columns
Because of accessibility complexities, tables should not be used for layout purposes. If you need side-by-side content, use the built-in Columns feature instead.
Always use the official Columns function rather than manually spacing text or inserting empty tables.

To create columns:
- Highlight the text you want to place in columns.
- Go to Format → Columns.
- Select the number of columns needed.
Google Docs will automatically format the content into properly structured columns.
Paragraph styles (Headings, Normal text, etc.) can still be applied within columns. This ensures your document maintains a proper heading structure and remains accessible.
Creating Accessible Tables
Tables should only be used for tabular data, not for visual layout. Screen readers:
- Announce the number of rows and columns
- Identify column and row headers
- Allow users to navigate cell by cell
Proper table structure ensures assistive technologies can interpret the data accurately.
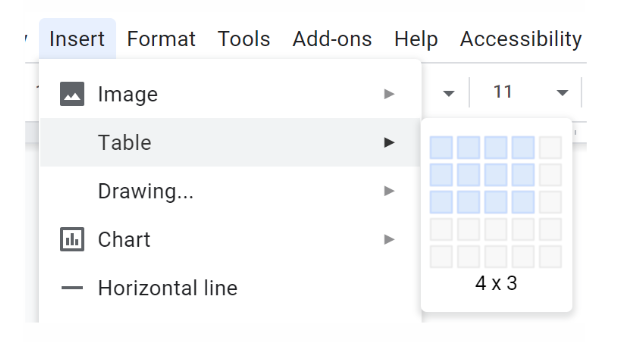
To insert a table:
- Select Insert → Table from the main menu.
- Choose the number of rows and columns from the grid.
- Click to insert the table into the document.
Use the Tab key to move from cell to cell and enter data efficiently.
Formatting Table Content
You may style text inside table cells:
- Highlight the row or cells.
- Use the Styles dropdown menu to apply appropriate heading styles or text formatting.
You may also adjust:
- Background color
- Text color
Border thickness
However, visual styling alone does not define table headers.
For assistive technology to properly interpret a table, header rows must be correctly defined. Simply bolding or styling a row does not create an accessible header.
To properly set header rows, see the Run Grackle Docs section.
Provide Descriptive Hyperlinks
Hyperlinks should be embedded within meaningful text to improve readability and accessibility. Avoid pasting full URLs directly into your document unless absolutely necessary.
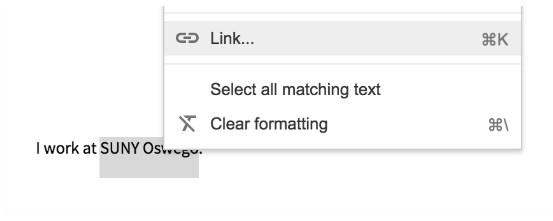
To create a hyperlink:
- Select the text you want to turn into a hyperlink (for example, SUNY Oswego).
- Right-click and select Link, or go to Insert → Link.
- Enter the full URL in the link field (for example, https://oswego.edu).
- Select Apply.
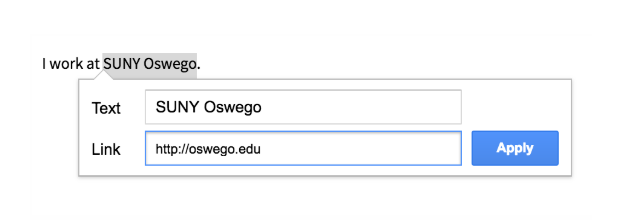
Example:
Instead of writing:
- https://oswego.edu
Write:
- “I work at SUNY Oswego.”
- (The words SUNY Oswego should link directly to the college’s website.)
Best Practices for Links
- Use clear, descriptive language (e.g., “Visit the SUNY Oswego website”).
- Avoid vague phrases like “click here” or “more.”
- Ensure the link text clearly describes the destination.
Run an accessibility check
Before sharing or distributing a document, always run an accessibility check to identify and correct potential barriers.
Grackle Docs is an accessibility checker add-on for Google Workspace applications. It is already installed on all campus owned computers. Follow the installation instructions if you are using a personal computer.
Install Grackle Docs
You only need to install Grackle once. After installation, it will be available in Google Docs, even when using a different computer.
- Go to Extensions → Add-ons → Get add-ons.
- Search for Grackle Docs.
- Select + Free to install.
- When prompted, review the permissions and select Allow to complete installation.

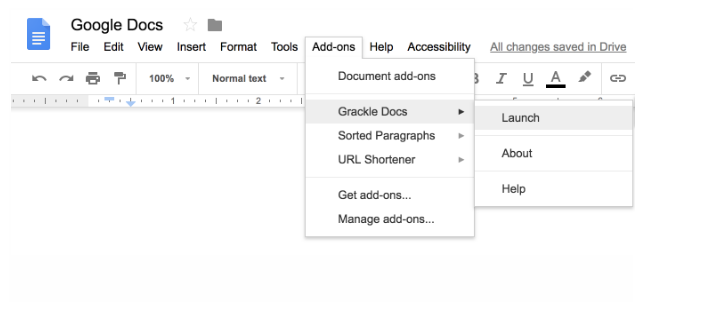
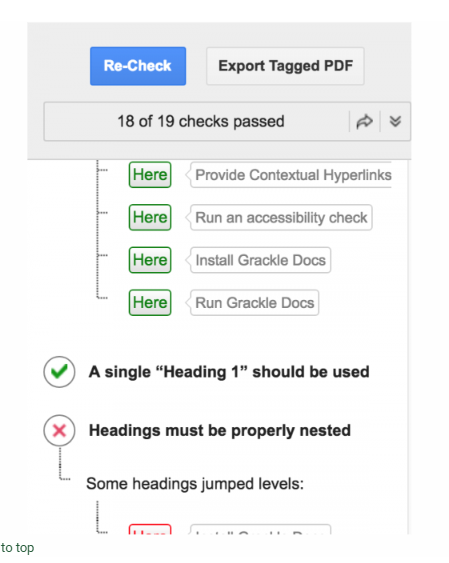
Run Grackle Docs
Before distributing your document:
- Go to Extensions → Grackle Docs → Launch.
- A sidebar will open displaying errors and warnings.
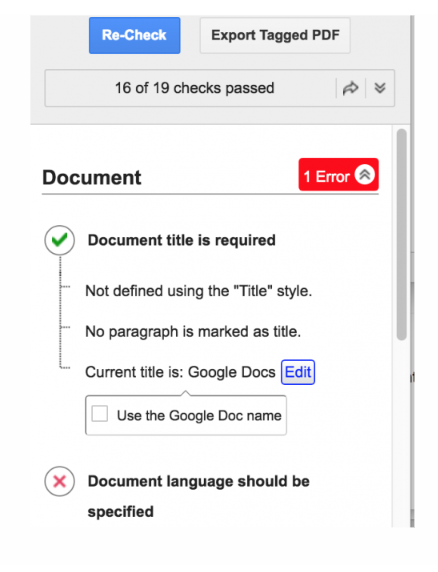
Grackle will identify common accessibility issues, including:
- Missing document title
- Missing document language
- Missing alt text
- Improper or missing table headers
- Skipped heading levels
Resolving Issues
- Click on an error for guidance on how to fix it.
- Select the “Here” button to jump directly to the flagged item in your document.
- For images without alt text, you can add a description or mark decorative images as artifacts so screen readers ignore them.
- For tables, select the “Tag” button to properly define header rows and/or columns.
Address each issue individually. When you have completed corrections:
- Select the Re-Check button at the top of the Grackle window to generate an updated report.
- Continue revising until all checks have passed.
Exporting and Downloading Google Doc
When you convert a Google Doc to another file format—such as a PDF or Microsoft Word document—accessibility features may not transfer perfectly. Even if your Google Doc is fully accessible, the exported file may contain new accessibility issues.
For this reason, you should always review the document again after conversion.
To download a Google Doc:
- Go to File → Download.
- Select the desired format (for example, PDF (.pdf) or Microsoft Word (.docx)).
After Exporting
If exporting to PDF:
Open the PDF in Adobe Acrobat Pro and run the built-in Accessibility Checker. Review and correct any flagged issues before distributing the document.
(See the Adobe Acrobat PDF tutorial for detailed instructions.)
If exporting to Microsoft Word:
Open the file in Microsoft Word and use the built-in Accessibility Checker. Review and correct any flagged issues before sharing the document.
(See the Microsoft Word tutorial for detailed instructions.)
Important Reminder
Accessibility does not automatically carry over between file types. Always verify accessibility in the final format you plan to distribute.
Additional Resources
- Accessibility for Docs Editors (Google Support). This includes instructions on how to do many of these tasks on the Android, iPhone and iPad versions of the software.
- For help on the paragraph styles use the Add a title heading or table of contents in a document tutorial (Google Support). This includes help with the Android, iPhone and iPad versions of the software.