Like any document, it is easiest to make a PowerPoint accessible when you plan to do so from the start.
These instructions are based on Microsoft Word 365 Pro Plus, used on a PC. A Mac PowerPoint tutorial is also available.
As an alternative to the tutorial below, view the YouTube PowerPoint Accessibility how-to videos.
Choose a Theme
Using Slide Layouts
Using Slide Masters
Slide Titles
Text Equivalents with Alt Text
Provide Descriptive Hyperlinks
Creating Accessible Tables
Check Reading Order
Run an Accessibility Check
Converting to a PDF
Additional Resources
Choose a Theme
PowerPoint includes built-in themes and layout templates that make it easier to create consistent, well-structured presentations. Use these whenever possible to help maintain a logical structure so screen readers can more easily navigate the content.
Themes control the overall visual design of the entire presentation.
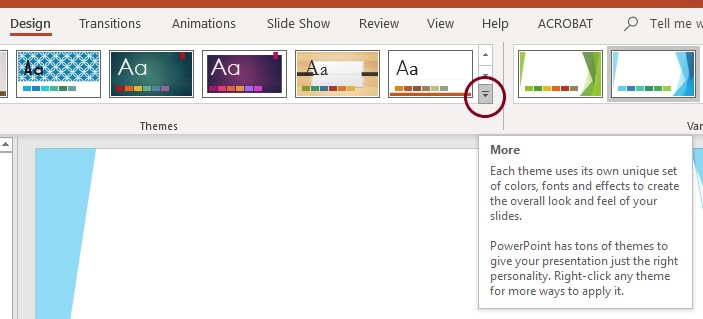
Select a Theme
- From the main ribbon, select Design.
- Expand the Themes section by selecting the dropdown arrow.
- Choose a theme.
When selecting a theme, keep in mind that not all pre-existing themes are fully accessible. Choose themes that are:
- Clean and simple
- High contrast between text and background
- Free of busy patterns or decorative backgrounds
Accessible themes improve readability for all users, including those with low vision or color vision deficiencies.
Use Slide Layouts
Each theme includes a variety of slide layouts. Layouts control the structure of individual slides and help ensure content is organized in a way that assistive technologies can interpret correctly.
Using built-in slide layouts helps maintain proper reading order and consistent formatting throughout the presentation.
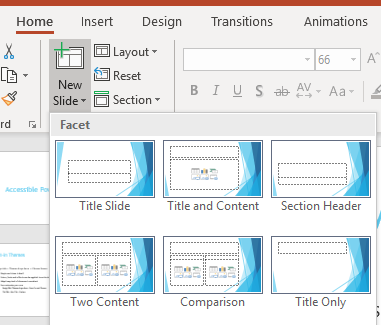
Add a New Slide Using a Layout
- From the Home tab, select New Slide.
- Choose the slide layout you want to use.
Change the Layout of an Existing Slide
- Select the slide you want to modify.
- From the Home tab, select Layout.
- Choose a different slide layout.
Using pre-existing slide layouts preserves the correct reading order, which is essential for screen reader users. Reading order is covered in more detail in the Check Reading Order section. Avoid adding extra elements to a slide unless absolutely necessary, as they can disrupt how content is read by assistive technology.
Slide titles are also critical for accessibility. Every slide should include a title so screen readers can identify and navigate slides effectively. Titles may be visually hidden if needed. This topic is covered in more detail in the Slide Titles section.
Using Slide Masters
Layouts have pre-set font and paragraph styles, but these can be modified. Rather than changing a style for each slide, a default can be set for the entire presentation by using the Slide Master. Default themes and styles allow for proper content structure and consistency.
- From the main ribbon, select View.
- Select Slide Master. Any change that is made within the master slide view will affect all slides that use that master.
Access the Slide Master
- From the main ribbon, select View.
- Select Slide Master.
Any changes made in the Slide Master view will apply to all slides that use that master layout.
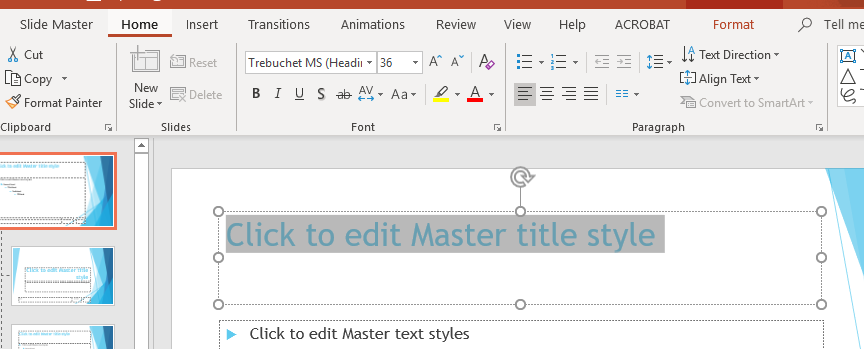
- On the Slide Master, highlight the text you want to modify.
- From the Home tab, use the formatting tools to adjust the text style as needed.
From the Home tab, you can modify both Font and Paragraph attributes, including:
- Font type, size, and color
- Text alignment
- List structure
- Line spacing and spacing before or after paragraphs
Line Spacing and Paragraph Spacing
Line spacing is the vertical space between lines of text in a paragraph. Text that is too closely spaced can be difficult to track for users with visual or cognitive disabilities. Conversely, text that is spaced too far apart may appear disconnected and harder to read.
- Use 1.5 line spacing for paragraph text.
For headings:
- The space after a heading should be slightly less than the space before the heading.
- To adjust spacing, select Line Spacing from the formatting menu and choose to add or remove space before or after the selected element.
Close the Slide Master
When you are finished making changes, select Close Master View to return to your presentation.
Save Your Styles as a Template
If you want to reuse the styles you’ve created in future presentations, save them as a default PowerPoint template.
- From the main ribbon, select File.
- Select Save As, then choose Browse.
- Navigate to:
- Local Disk (C:)
- Users
- Your username folder
- Documents
- Custom Office Templates
- Enter a name for your template in the File name field.
- From the Save as type menu, select PowerPoint Template.
- Select Save.
Formatting Tips
Use formatting choices that improve readability and accessibility:
- Use 24-point text or larger for paragraph and bulleted text. Headings should be larger than body text.
- Use only one font throughout the presentation.
- Choose fonts designed for on-screen reading and widely available across devices, such as:
- Georgia Verdana Trebuchet Arial Calibri Gill Sans Corbel Calisto MT
Slide Titles
Each slide should include a unique title to support assistive technology. Slide titles help screen readers identify slides and allow users to navigate efficiently through a presentation.
If a visible title is not appropriate for the slide design, the title can be hidden while remaining available to assistive technology.
Add a Slide Title
- Enter an appropriate title in the slide’s title box.
Hide a Slide Title
- From the main ribbon, select the Home tab.
- In the Arrange section, choose Selection Pane.
- The Selection Pane displays all objects on the slide.
- Locate the slide title in the list.
- Select the eye icon next to the title to toggle its visibility.
Turning off the visibility of the title box keeps the title available to assistive technology while removing it from the visual layout.
For content that spans multiple slides, each slide title should be slightly different so users can distinguish between them.
Examples:
- Features of Campus (1 of 3)
- Features of Campus (2 of 3)
- Features of Campus (3 of 3)
— or — - Features of Campus (continued)
Using unique slide titles helps people who use assistive technology understand where they are in the presentation and move efficiently from slide to slide.
Text Equivalents with Alt Text
All images in a PowerPoint presentation should include alternative text (alt text). Alt text provides a description that conveys the meaning or context of an image to users who cannot see it, such as those using screen readers.
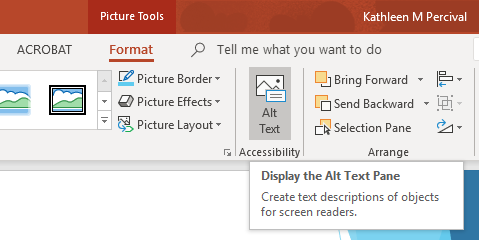
Add Alt Text to an Image
- Select the image in your slide.
- The Picture Tools tab will appear in the ribbon (this tab is hidden when the image is not selected).
- Select Format, then choose Alt Text.
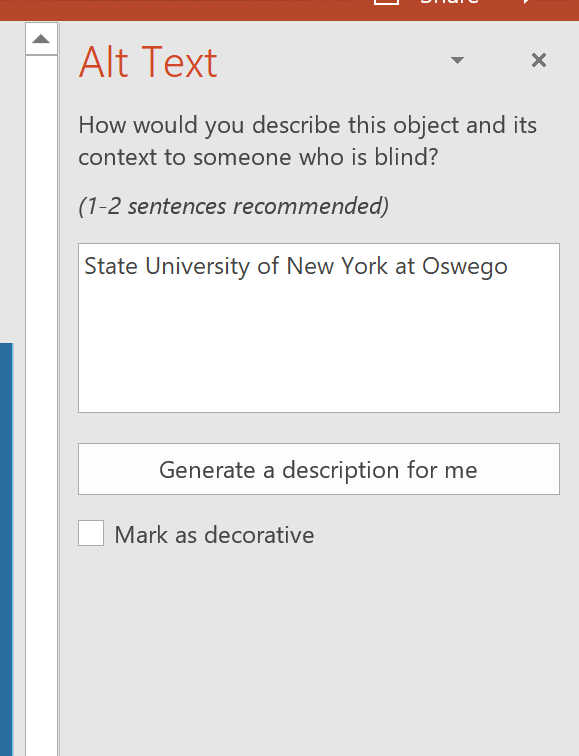
Write Effective Alt Text
- Enter a full description in the Description box.
- Example: For the SUNY Oswego logo, type:
State University of New York at Oswego
- Example: For the SUNY Oswego logo, type:
- For complex images (such as charts, graphs, or diagrams):
- Use the Title field for a brief label (e.g., Enrollment by Year).
- Provide a full description in the Description box that explains the data or key information conveyed by the image.
- For decorative images that do not add meaningful content to the slide:
- Check the Mark as decorative box, or consider removing the image entirely.
- Do not use the “Generate a description for me” button.
- As the presentation designer, you are responsible for ensuring the alt text accurately conveys the purpose and meaning of each image.
Providing clear, intentional alt text ensures that all users, including those using screen readers, receive the same information and context as visual users.
Provide Descriptive Hyperlinks
Hyperlinks in a digital document should be embedded within meaningful text to improve readability and accessibility. The linked text should clearly indicate where the link goes and make sense even when read out of context.
Do not use vague phrases like “click here” or “read more”. Avoid linking entire sentences; keep link text concise and descriptive.
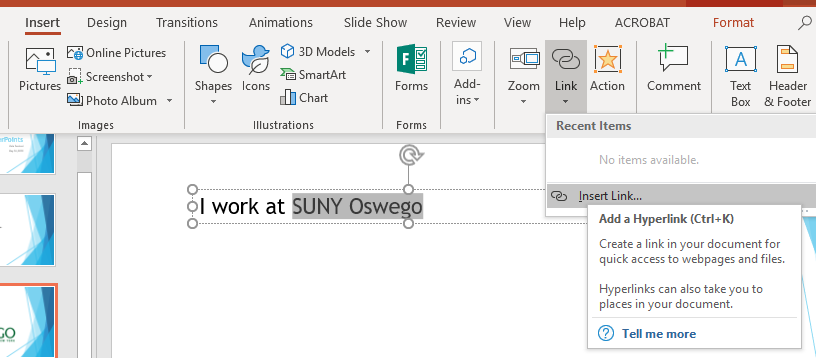
Add a Hyperlink in PowerPoint
- Highlight the text you want to turn into a hyperlink (e.g., SUNY Oswego).
- From the ribbon, select the Insert tab.
- Click Link, then choose Insert Link.
This links the selected text directly to the desired webpage or location within your presentation.
Link to an External Web Page or Another Slide
You can link to either an external website or a slide within your presentation.
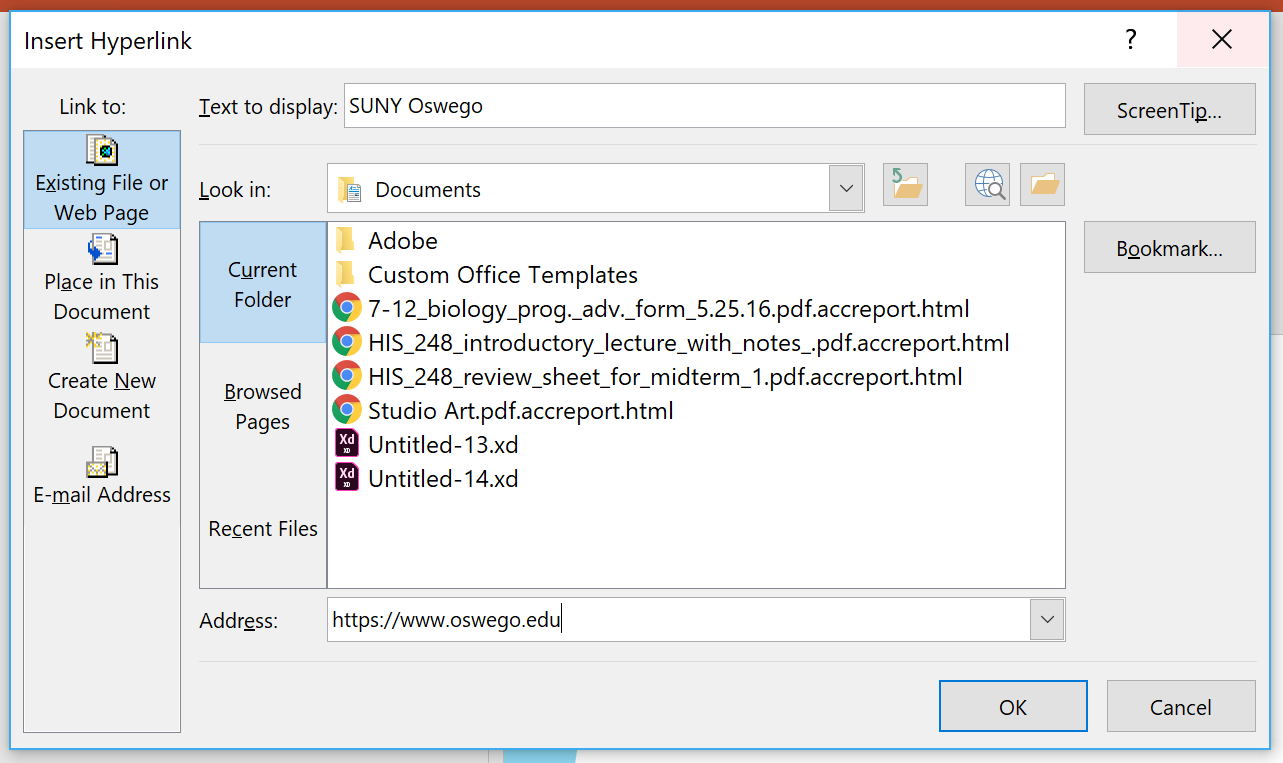
To link to an external website:
- After selecting the text and opening the Insert Link dialog, choose Existing File or Web Page.
- Enter the full URL in the Address field.
- Example: http://oswego.edu
- Select OK (or Apply) to create the hyperlink.
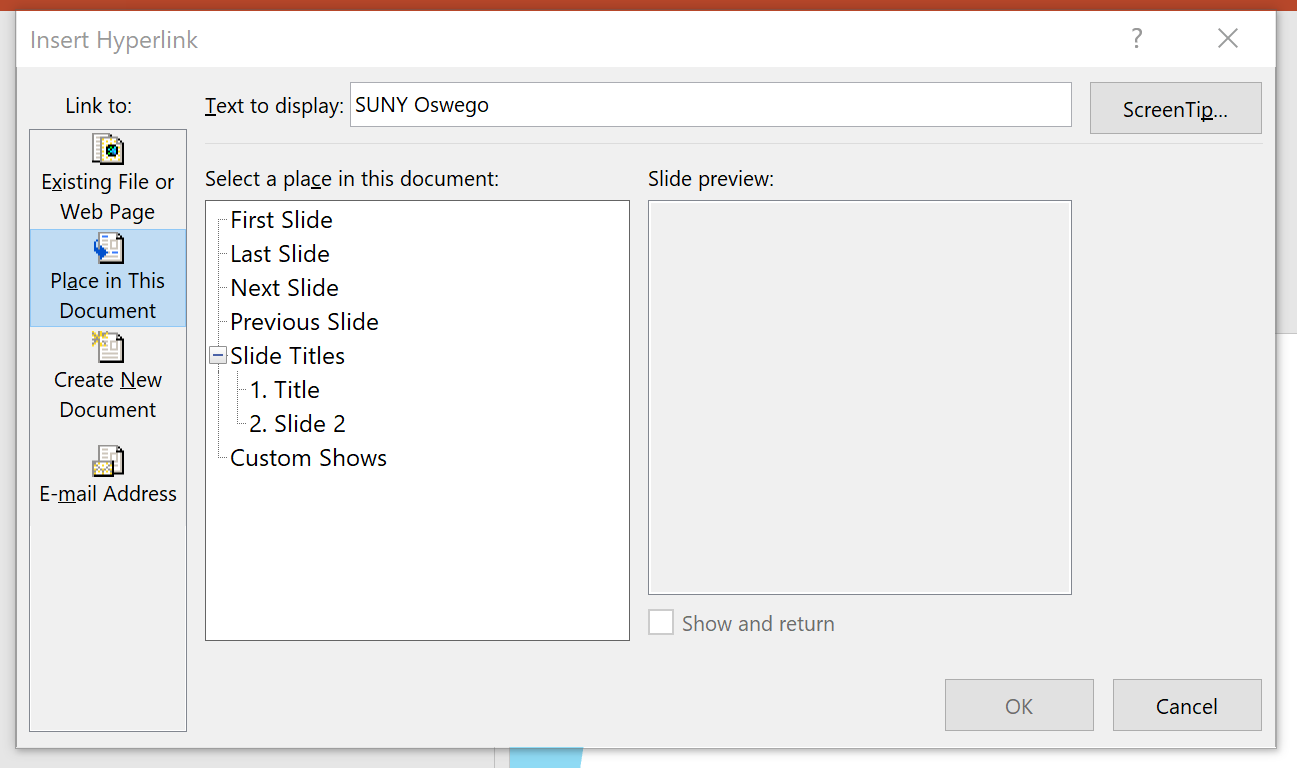
To link to another slide within the presentation:
- After selecting your text and opening the Insert Link dialog, choose Place in This Document.
- Select the slide you want to link to from the list.
- Click OK (or Apply) to create the hyperlink.
Creating Accessible Tables
Use tables only for tabular data, not for layout or visual formatting. Screen readers rely on proper table structure to:
- Identify the number of rows and columns
- Read column and row headers
- Enable users to navigate through the table one cell at a time
Proper table markup ensures that all users, including those using assistive technology, can understand and navigate your data.
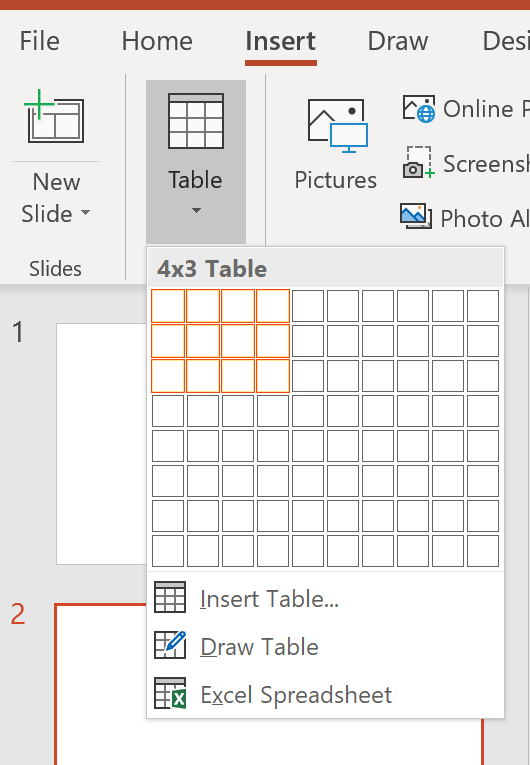
Insert a Table in PowerPoint
- From the Insert tab in the main ribbon, select Table.
- A drop-down grid will appear. Highlight the number of rows and columns you need.
- OR select Insert Table from the menu and enter the number of rows and columns manually.
- The table will be added to your slide.
Define Table Headers
Do not use tables for layout purposes. Tables should only be used for tabular data. Properly defined headers help screen readers interpret the table correctly.
To define headers in a data table:
- Place your cursor inside the table.
- From the main ribbon, under Table Tools, select the Design tab.
- Ensure the Header Row and First Column checkboxes are selected.
This marks the top row and/or first column as headers, allowing screen readers to announce them when navigating the table.

Style Table Content
You can apply font and paragraph formatting within tables to improve readability, as long as proper table structure and headers are maintained.
- Highlight the cell, row, or column you want to format.
- From the main ribbon, select the Home tab.
- In the Font and Paragraph sections, choose the formatting options you want, such as:
- Font type and size
- Font color
- Text alignment
- Line spacing
Tip: Styling should enhance readability without disrupting the table structure or header definitions.

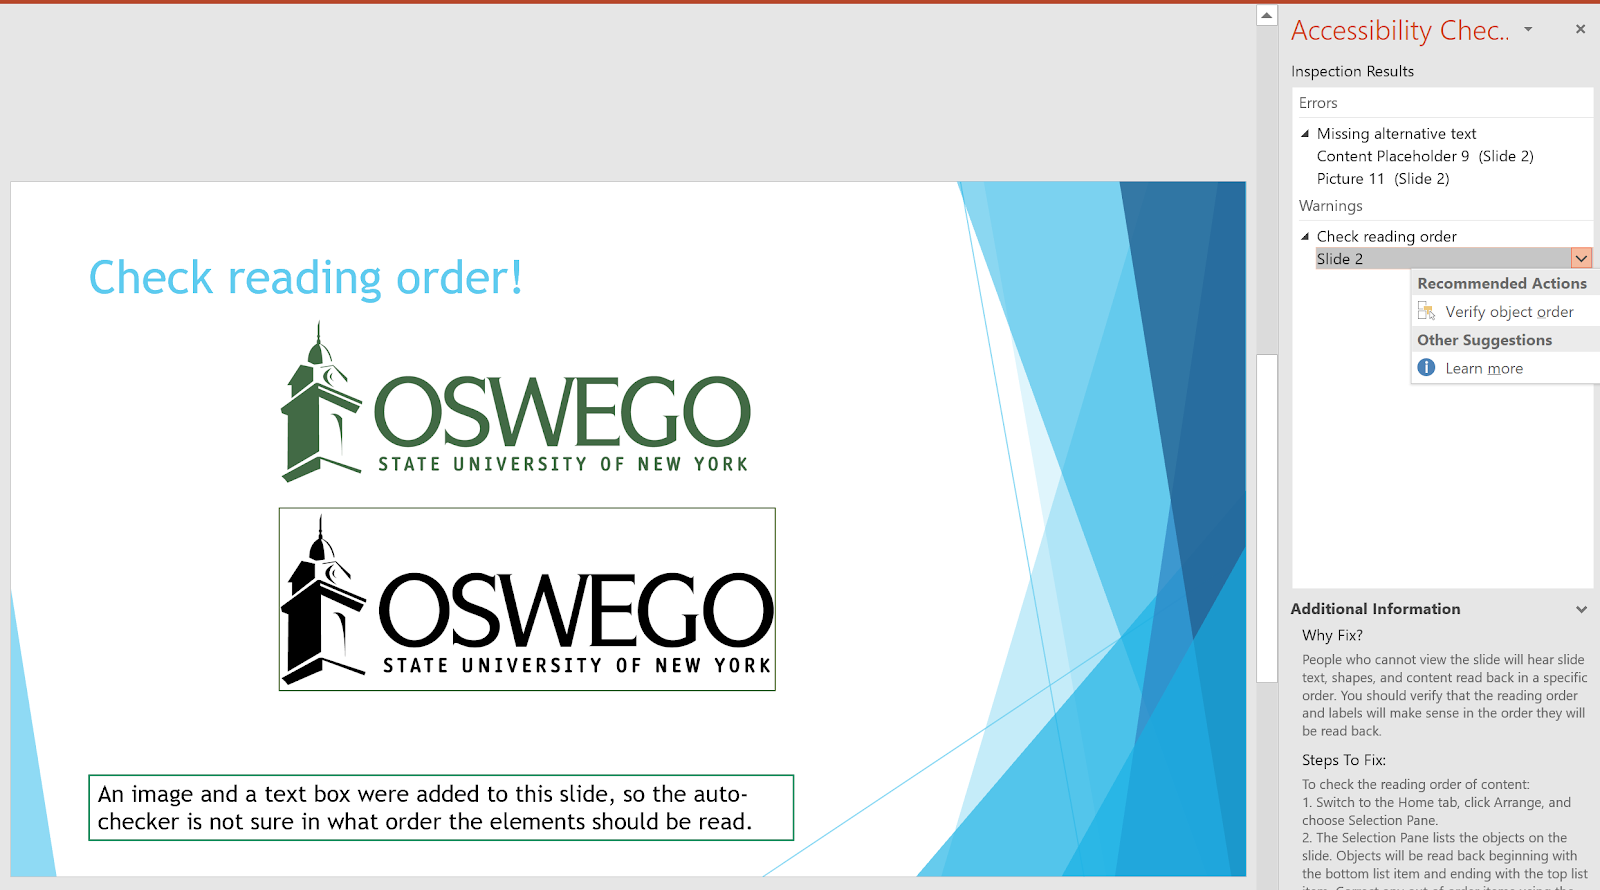
Check Reading Order
When elements are added to a slide layout, the order in which they are read by a screen reader may not match the visual layout. It is important to verify the reading order to ensure that content is presented logically to users of assistive technology.
For example, if an image and a text box are added to an existing slide layout, a screen reader may read them in an unexpected order. This can trigger a “Check reading order” warning when running an accessibility checker.
Verify or Change Reading Order
To see the order in which elements are “read” by a screen reader:
- From the main ribbon, select the Home tab.
- In the Arrange section, choose Selection Pane.
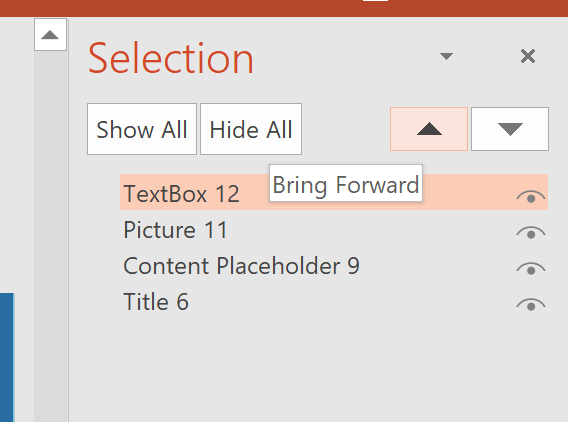
The Selection Pane displays all objects on the slide in the order they will be read by assistive technology.
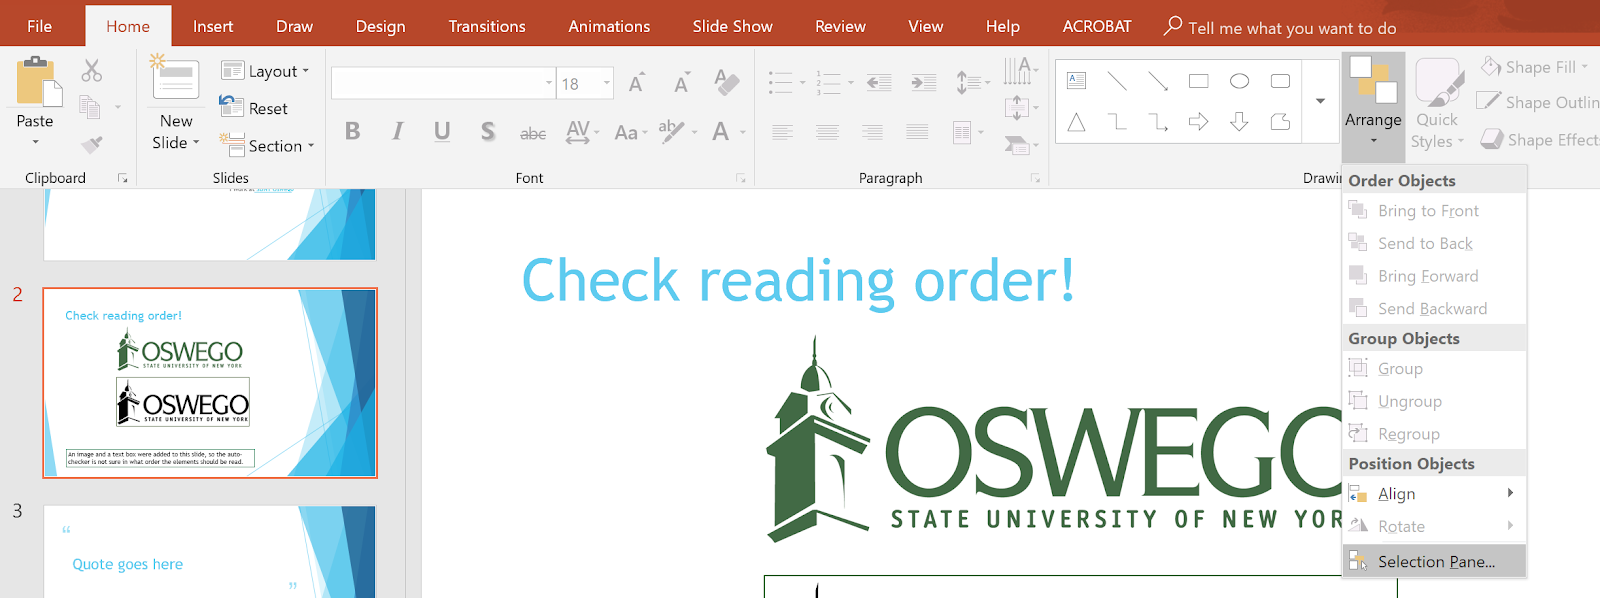
How Objects Are Read by Assistive Technology
Objects on a slide are read starting with the bottom item in the Selection Pane and ending with the top item.
- Highlight an item in the Selection Pane to see which element it corresponds to on the slide.
- Example: If a newly added text box (Textbox 12) appears at the bottom of the list, it will be read first by a screen reader.
- If the intended reading order requires this text box to be read last, it needs to be moved to the top of the list in the Selection Pane.

To adjust the reading order of objects:
- In the Selection Pane, select the item you want to move.
- Reposition the item by either:
- Dragging it to the correct location within the list using your mouse, or
- Using the up and down arrows to move the item to the desired position.
Adjusting the order in the Selection Pane ensures that screen readers read content in the intended, logical sequence.
After repositioning Textbox 12 to the top of the Selection Pane, the reading order for the slide would be:
- Title 6 – “Check reading order!”
- Content Placeholder 9 – Green logo
- Picture 11 – Black logo
- Textbox 12 – “An image and a text box…”
This ensures that the slide content is read in a logical, meaningful sequence by assistive technology.
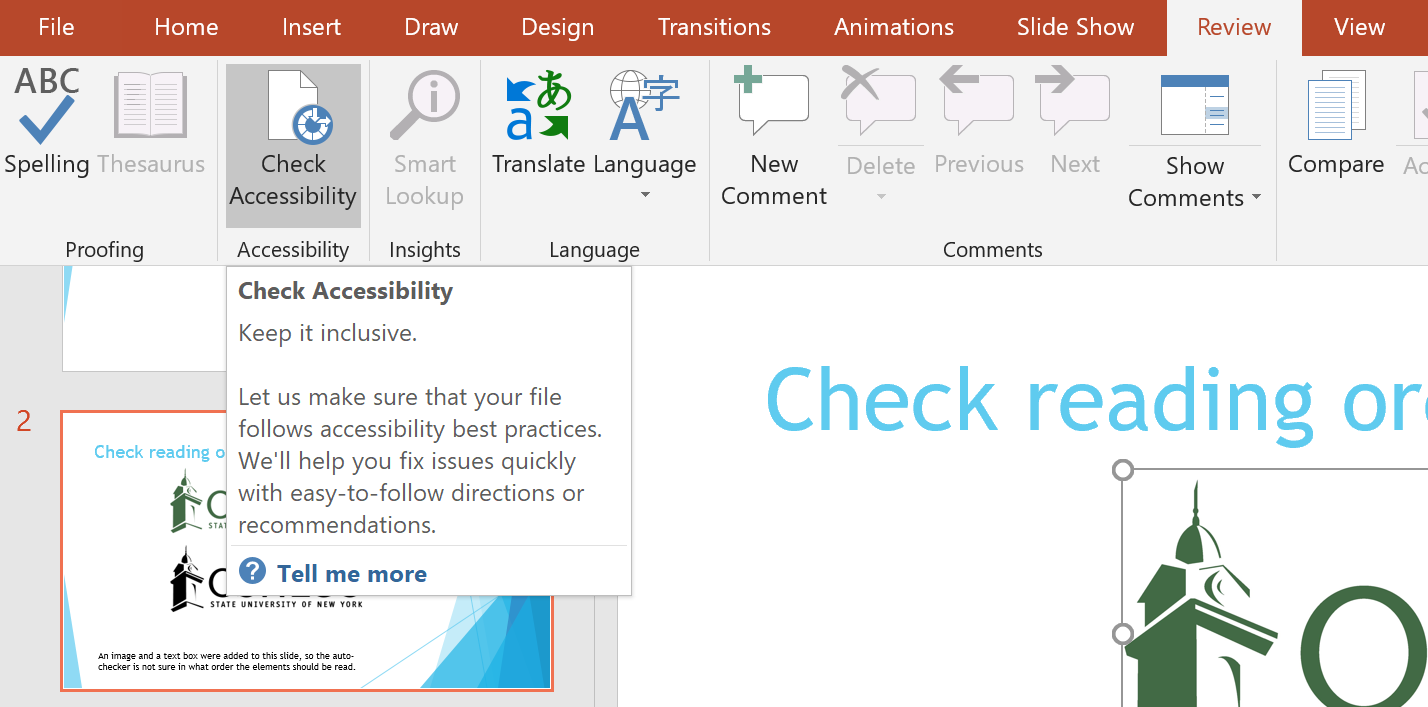
Run an Accessibility Check
PowerPoint includes a built-in accessibility checker to help identify potential issues before sharing your presentation.
- From the main ribbon, select the Review tab.
- Click Check Accessibility.
The accessibility checker will display errors, warnings, and tips to help make your slides more accessible to all users.
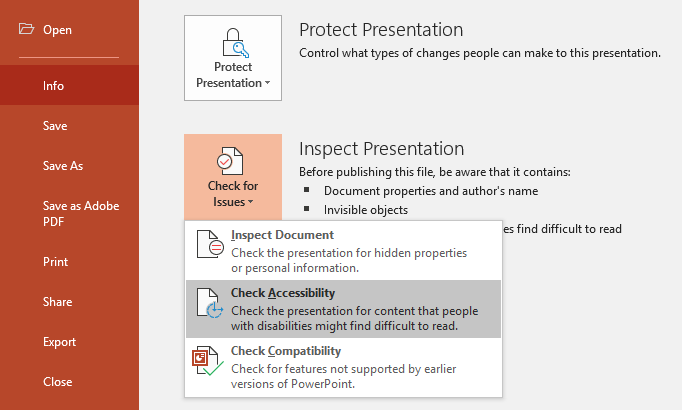
Alternative Way to Run the Accessibility Checker
- Select the File tab.
- Choose Check for Issues, then select Check Accessibility.
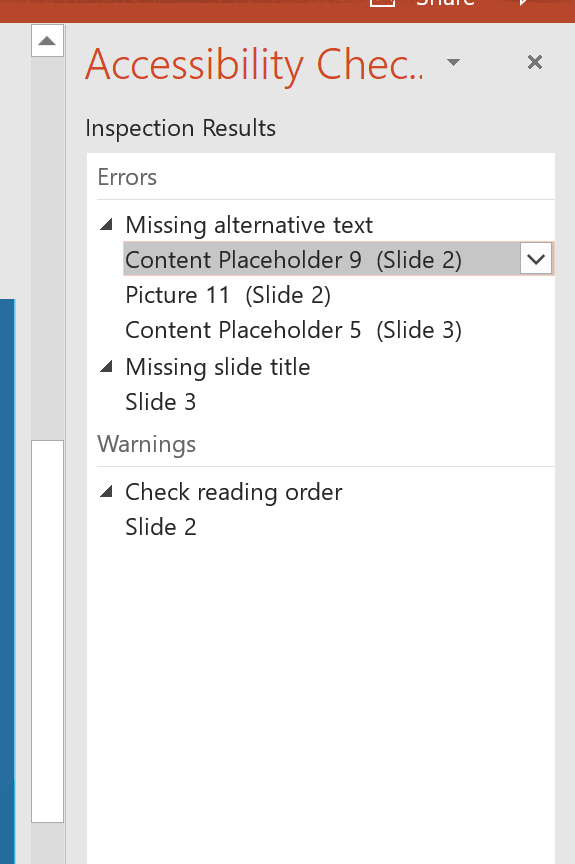
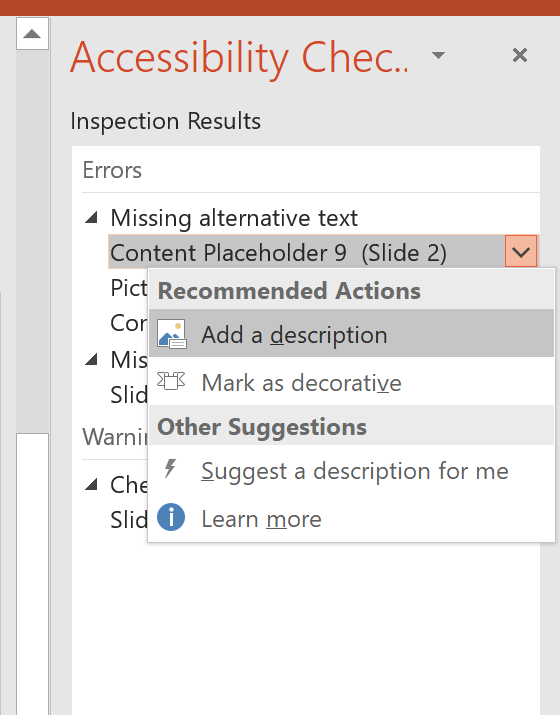
Review and Resolve Accessibility Issues
- A sidebar will open, listing errors, warnings, and tips.
- Highlight each issue to view guidance on how to fix it.
- Address each issue one at a time throughout the presentation.
- Continue revising until all accessibility checks have passed.
Running the accessibility checker and resolving flagged issues ensures your presentation is accessible to all users, including those using screen readers or other assistive technology.
Converting to a PDF
When exporting a PowerPoint presentation to another format, such as a PDF, accessibility may not fully transfer, even if your original PowerPoint is fully accessible.
If you convert your presentation to a PDF:
- Review the PDF carefully in Adobe Acrobat Pro using its built-in accessibility checker.
- Address any accessibility issues before distributing the document.
Export as an Adobe PDF
- Click the File tab.
- Select Export, then choose Create Adobe PDF.
Note: Using Save or Save As may not preserve all accessibility features from PowerPoint.
Additional Resources
- Article, “PowerPoint Accessibility” from WebAIM
- Article, “How to Make Your Presentations Accessible to All” from W3C
- Article, “Make your PowerPoint presentations accessible” from Microsoft Office Support